Sealing New vs. Aged Pavers: Timing and Technique
The right sealer, applied at the right moment, does more than make pavers look good. It locks in color, keeps sand in place, sheds stains, and stretches the life of the surface by years. The wrong timing or technique does the opposite. It traps moisture, fogs the finish, and creates maintenance headaches that can be expensive to undo. I’ve seen brand new patios haze over within a week because the installer rushed the sealer. I’ve also seen fifteen-year-old driveways with deep color and tight joints because someone followed a thoughtful process. The difference is usually patience, surface prep, and product fit.
This guide draws on field experience sealing concrete pavers, clay brick, and natural stone in climates with high humidity, heavy rain, and lots of sun. Florida homeowners searching “paver cleaning Lutz,” “paver sealing near me,” or “driveway pressure washing near me” often ask the same questions: When can I seal new pavers? How do I revive an older surface that has seen better days? What’s the right paver sealer and what happens if I pick wrong? The answers are practical, not theoretical, and they hinge on reading the surface in front of you.
What sealing accomplishes when it’s done well
A good sealer isn’t a paint or a glue. Think of it as a breathable barrier with a purpose. For concrete pavers, the best professional products penetrate the capillaries, then form a microfilm that resists water and oils. On clay brick and natural stone, penetration matters even more because you want stain resistance without plastic shine. A solid sealing job helps in four ways: it stabilizes the joint sand so the surface quiets underfoot and resists washouts, it resists staining from oil, food, and leaf tannins, it slows color fade from UV exposure, and it makes cleaning easier, especially when you use a light pressure washing service later.
There are limits. Sealer won’t fix a failing base or lift low spots. It won’t erase rust or battery-acid burns without proper prep. And if you use the wrong chemistry for the substrate, you can amplify problems. Water-based acrylics are forgiving on concrete pavers and allow vapor to escape. Solvent-based acrylics deepen color more aggressively, but they can trap moisture if the surface is not truly dry. Two-part urethanes bring top-tier durability and sand lock, but they demand meticulous prep and correct mixing. You need to match the product to both the paver and the conditions.
New pavers: how long to wait, and why curing matters
Fresh concrete pavers leave the plant with internal moisture and trace efflorescence just waiting to bloom. If you cap that moisture under a non-breathable film, you create a cloudy, milky haze or patchy whitening. The rule of thumb I give builders weatherproofing and homeowners is time with an asterisk: wait 30 to 60 days after installation for concrete pavers, provided the site drains well and the weather cooperates. In cooler, damp periods or on shaded sites, 60 to 90 days is safer. Clay brick can be sealed sooner, often within 14 to 30 days, because it is fired and does not cure like concrete. Natural stone depends on the porosity and any quarry sealers applied, so test first.
Those numbers are guidelines, not gospel. What matters is moisture content and surface readiness. You can check using a simple sheet test. Tape a 2-by-2-foot piece of plastic to the pavers on a sunny, dry day after the surface has been dry at least 24 hours. If you see fogging or droplets under the plastic after a few hours, the pavers are still outgassing moisture. Wait. If the test stays clear and the temperature sits within the sealer’s application window, you are closer to green light.
Installers often ask if they can seal next day to protect the jobsite from spills and tire marks. I advise a compromise. If you must protect early, use a breathable, penetrating water repellent that adds minimal film and does not trap moisture, then plan a film-forming topcoat months later. That allows you to shield against early stains without setting a haze trap.
Efflorescence and first-wash prep
Efflorescence shows up as chalky white film or patches. It’s calcium salts migrating to the surface as moisture evaporates. Sealing over efflorescence locks in the bloom and keeps it visible, which defeats the point of all the careful work. On new concrete pavers, efflorescence often appears within the first weeks as the material equilibrates. The first deep clean should happen after that bloom, not before it.
In practice, the first wash for new pavers mixes gentle technique and the right chemistry.
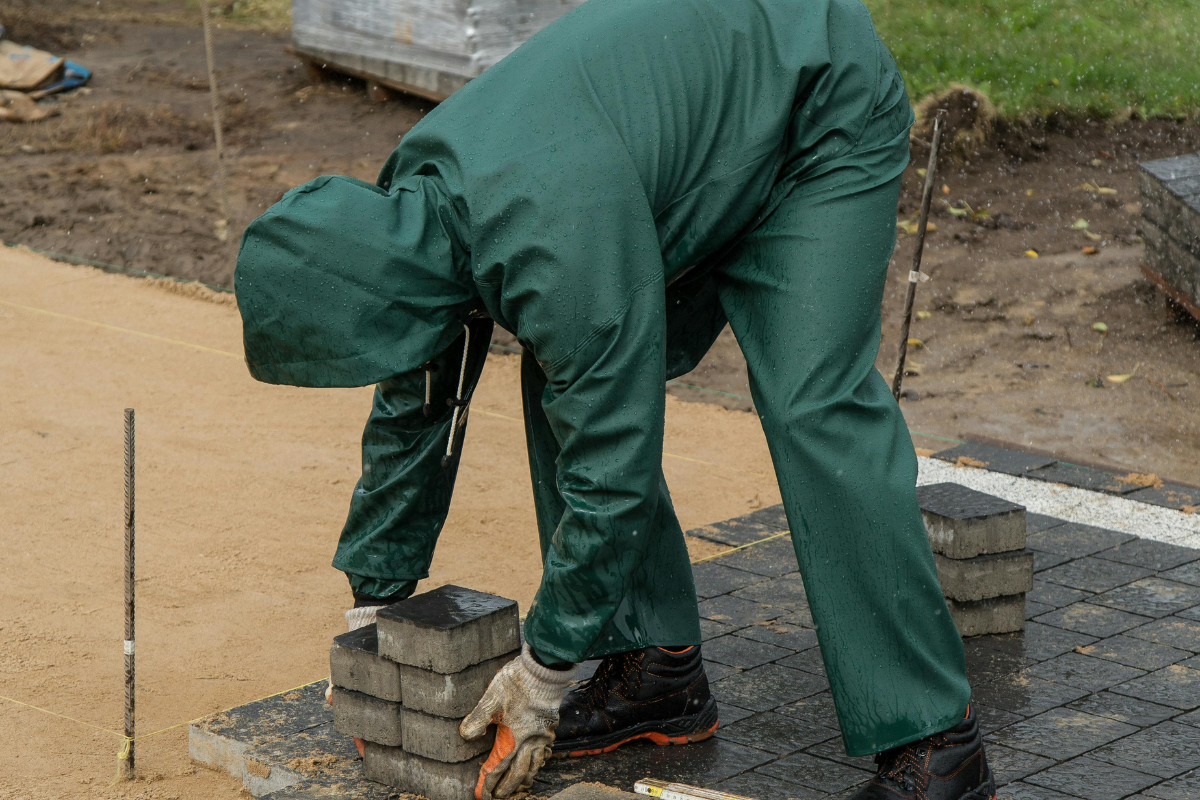
- Prep checklist for new pavers before sealing:
- Dry sweep and vacuum to remove grit that could scratch during washing.
- Wet the surface evenly, then apply an efflorescence cleaner diluted per the label. Avoid acid-strong solutions that can etch and dull.
- Agitate with a soft deck brush in tight areas rather than blasting with a wand. Rinse thoroughly.
- Allow at least 24 to 48 hours of dry time, longer if humidity is high, before sanding joints and sealing.
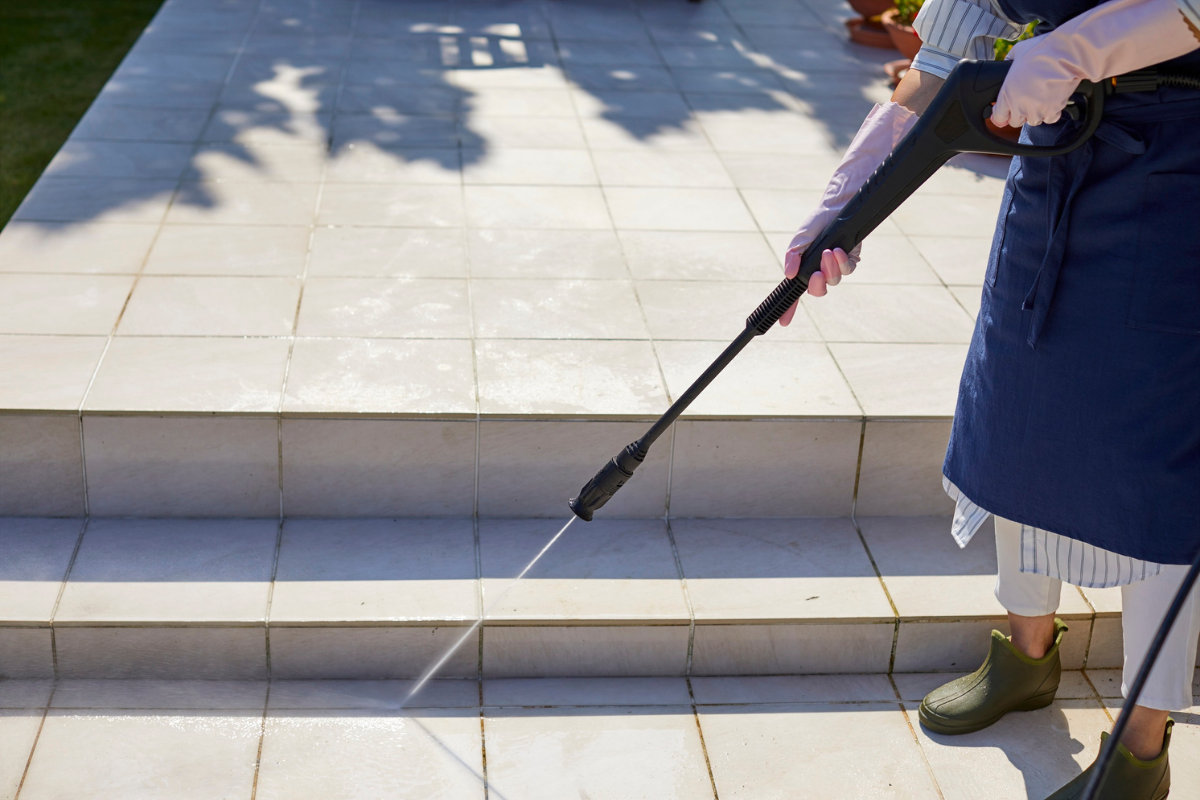
That’s one of the only places where a list helps. It’s a real-world order of operations that cuts problems later. Many homeowners call about “paver sealing near me” after a contractor washed too aggressively. High-pressure lance work at close range can scar the face, blow out joint sand, and even lift corners. When you search for pressure washing, look for a company that uses surface cleaners, balanced GPM and PSI, and understands joint integrity. The right pressure washing service never needs to carve grooves to get a surface clean.
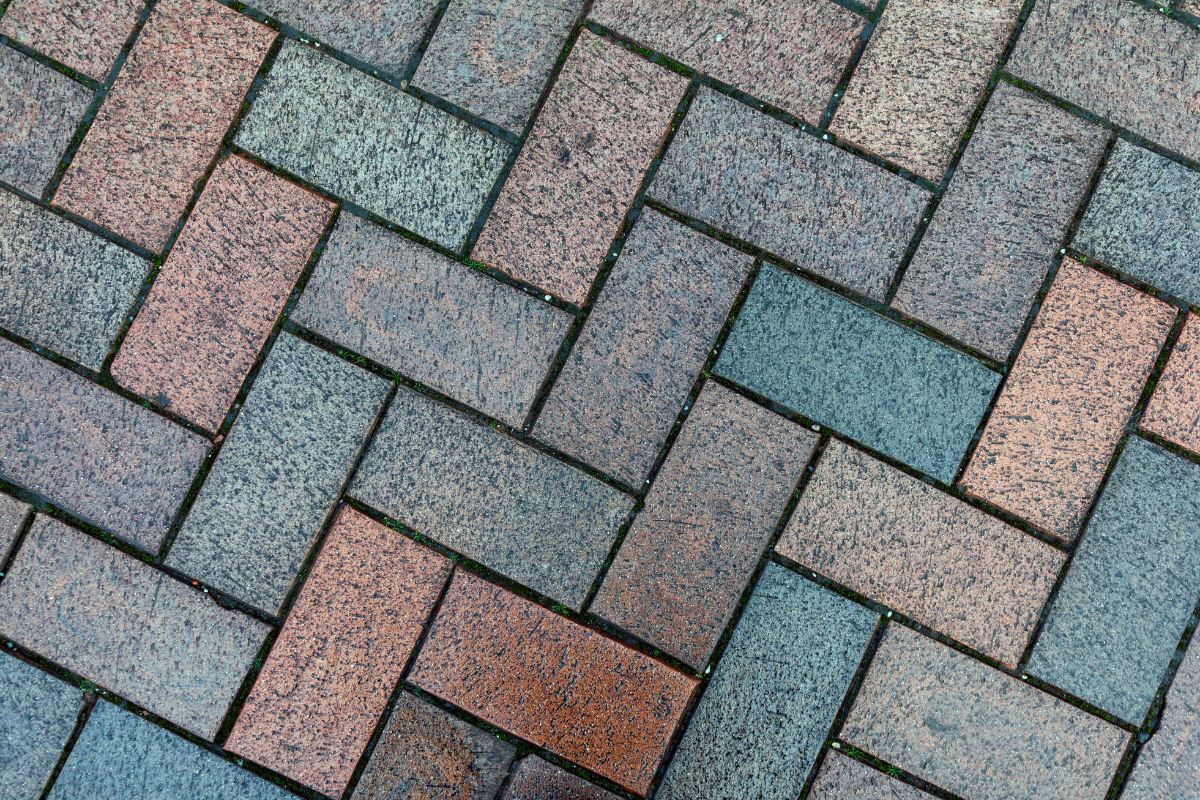
Joint sand: polymeric, standard, and how sealing interacts
Sealing and sand stabilization go hand in hand. If you plan to lock joint sand with a film-forming sealer, you need the right grain size and a dry surface. Polymeric sand brings its own binder that hardens with water. Standard silica sand relies on the sealer to encapsulate and stabilize it. Each approach can work well, but the workflow differs.
If you use polymeric sand, sweep it in, compact lightly to settle, sweep off the excess until the faces are clean, then activate with a gentle, even mist per the sand manufacturer’s instructions. That activation is an art: enough water to set the binder, not so much that you flush it or create crusts. After full cure, typically 24 to 48 hours in warm weather, return for sealing. If you seal too soon, you can trap moisture from the polymeric sand and fog the finish.
If you choose standard sand, you can integrate sand locking into the sealing step. Sweep dry sand into the joints and compact until the joints are well packed. Blow the face clean. Apply the first coat of sealer to wet the joint sand and draw the resin down. Once that first application flashes off to tack-free, apply the second coat in a cross pattern. The resin encapsulates the upper portion of the sand and locks it. This method works beautifully with quality water-based acrylics and two-part urethanes, but it depends on dry weather and a paver body with low internal moisture.
Aged pavers: diagnosing before you prescribe
Older pavers carry history. You’ll find a mix of issues: oxidized sealer, patch repairs, weed roots in joints, rust halos from furniture, leaf tannin stains under trees, and sometimes tire shadowing from years of parking in the same spot. Before you plan a wash and seal, study what you have. Is there a sealer on the surface already? A simple solvent rub test helps. Dampen a rag with xylene or mineral spirits and touch a discreet spot. If it gets sticky or transfers, you’re dealing with a solvent-based acrylic. If nothing happens, it may be a water-based acrylic, a deeply penetrated sealer, or nothing at all. You can also dribble water in a test area. Beading indicates some repellency remains.
The biggest mistake with aged pavers is layering incompatible products. Putting a water-based acrylic over a degraded solvent-based film can create whitening or poor adhesion. Adding a solvent-based acrylic over a soft water-based film can cause lifting, alligatoring, or patchy gloss. If the existing sealer is failing, strip it. Yes, stripping is messy, but it beats living with a gummy surface.
For stains, match the solution to the problem. Rust wants an oxalic or reducing rust remover. Tannins respond to oxygenated cleaners. Oil needs a poultice or enzymatic degreaser. Hard water deposits can require gentle acidic cleaners, carefully applied and neutralized. For mold and algae in humid regions like Lutz and the greater Tampa Bay area, a low-percentage sodium hypochlorite solution with a surfactant cleans well, followed by thorough rinsing. Don’t add high pressure unless you enjoy pitted pavers and opened pores. With driveway pressure washing near me searches, insist the company uses controlled pressure and fan tips, and maintains a safe standoff distance.
Once clean, aged pavers benefit from a 24 to 72 hour dry window. In humid weather, push to the longer end. Any trapped moisture under a new film will telegraph as haze.
Choosing the right paver sealer for the surface and setting
Product fit is where experience matters most. Each technology brings strengths and pitfalls. There isn’t a single best paver sealer because climate, substrate, and goals differ.
Water-based acrylics are the workhorses for concrete pavers in warm, humid climates. They breathe better, which reduces whitening risk. They are easier to apply and clean up with water. Quality formulations offer matte to wet-look options. The trade-off is slightly less depth of color and potentially a shorter service life, often two to three years before a maintenance coat, depending on traffic and UV load.
Solvent-based acrylics deliver punchier color enhancement and higher gloss. They can make faded pavers pop like they are wet. They also tend to be less forgiving with moisture. Apply them to pavers Licensed and insured paver sealing that still outgas and you get milkiness or blushing. Work with them on a hot day and you risk roller marks or solvent pop. If you choose solvent-based in a place like Lutz, pick a product with good permeability and plan your window carefully.
Two-part urethane sealers provide excellent abrasion resistance and top-tier sand lock. They resist hot tire pickup, which matters on driveways exposed to brutal summer heat. They must be mixed at the exact ratio and applied within a pot life window. Surface must be very clean and very dry. If you want a satin to low-gloss, high-durability finish, these are worth the extra care. Used wrong, they can cure cloudy or bond to contaminants and fail in sheets.
Penetrating sealers such as silane or siloxane blends are perfect when you want water repellency asphalt driveway cleaning without altering appearance. They don’t stabilize sand or add gloss. On dense clay brick, they help with freeze-thaw and salt resistance. On limestone and travertine, specialized penetrating products protect without turning the surface plastic.
For mixed-material projects, test is everything. You might use a penetrating sealer on the natural stone inlays and a film-forming acrylic on the concrete pavers around them, masking carefully and sequencing your steps to avoid overlap.
Application technique that saves you from callbacks
I’ve been called to fix plenty of DIY missteps. Almost all of them share a few patterns: sealing over damp pavers, applying too thick, and poor overlap control. The goal is thin, even coats, not a drenching. Heavy application traps solvents or water and creates blushing, roller tramlines, or slip hazards.
Professional crews eco-friendly pressure washing often use a low-pressure sprayer for even delivery and a microfiber T-bar or roller back-roll to work the product in and control puddles. Rolling alone can work on smaller patios, but edges and joints tend to drink more. Keep a wet edge, work in manageable sections, and plan your exit so you’re not trapped walking over fresh sealer. Watch wind. Overspray onto vehicles or glass is a headache you can avoid with shields and calm conditions.
Temperature and dew point matter. You want the surface temperature within the manufacturer’s range, often 50 to 90 degrees Fahrenheit. More important, keep at least 5 degrees between surface temperature and dew point during and for several hours after application. If the dew falls, you wake up to a cloudy, compromised film. Check the forecast for overnight lows and humidity, not just the afternoon high. Afternoon sealing in coastal humidity often runs straight into evening dew. Morning starts can be safer, as long as the surface dries from any overnight moisture.
A tale of two jobs: new patio vs. twenty-year driveway
A new backyard patio in Lutz, 800 square feet, charcoal concrete pavers with a subtle texture. The homeowners wanted a soft satin look without a high-gloss shine. After installation, we waited six weeks, then performed a light efflorescence wash using a buffered cleaner. We sanded with fine silica, blew the face clean, then sealed with two coats of a water-based acrylic in satin, sprayed and back-rolled. Joints locked nicely, color deepened a shade, and the finish felt natural, not plasticky. We scheduled it mid-morning on a week with low afternoon humidity. Zero haze, zero callbacks.
Contrast that with a twenty-year-old driveway, 1,500 square feet, tan and red blend concrete pavers. Multiple prior sealers, some solvent-based, with patchy gloss and whitening. We performed a solvent test, confirmed solvent-based acrylic present, and decided to strip. That took a gel stripper, containment, and a high-flow surface cleaner to lift the goo. After full neutralization and a 48-hour dry window, we spot-treated rust and oil shadows, resanded, and used a two-part urethane. The driveway sees heavy vehicle traffic, so durability was the priority. The satin urethane resisted hot tire marks through the first summer and kept joint sand tight. Stripping added cost and time, but the long-term result justified both.
Regional realities: heat, rain, and maintenance intervals
Florida’s heat and surprise showers create a constant tug-of-war. In summer, a storm can roll in at 3 pm and dump an inch in ten minutes. If you start sealing at noon on a marginal day, you may not beat the rain. In spring and fall, overnight dew can be even worse than rain for whitening. That’s why local outfits that focus on paver cleaning Lutz and surrounding towns schedule sealing around stable windows and often split wash and seal over two visits. It’s tempting to do washing and sealing in one day, but unless the surface is baking dry and conditions are perfect, patience wins.
Maintenance intervals depend on sun exposure, traffic, and the product you used. Expect two to three years for water-based acrylics in full sun patios, possibly longer on shaded walkways. Solvent-based acrylics can stretch similarly but are more sensitive to moisture on recoat. Urethanes can go three to five years on driveways if prep was right. When you start seeing dullness, sand loosening, or stain uptake, it’s time for a maintenance coat. Do not stack coat after coat without cleaning and deglossing. At some point, you need a reset.
Safety, slip resistance, and sheen choices
High gloss looks dramatic in photos. It can also get slick when wet, especially on smoother pavers. If children run through sprinklers or the area sits by a pool, prioritize traction. Many professional sealers accept a grip additive broadcast into the topcoat or mixed in during application. It looks like nothing in the film but adds bite underfoot. Satin and matte finishes also help with traction compared to high gloss.
On the safety front, PPE matters for both washing and sealing. Mild acids and oxidizers used during cleaning need eye and skin protection. Solvent-based sealers demand respirators and careful ventilation. Even water-based products can irritate lungs during spraying. Professionals build this into their process. If you’re DIY’ing, don’t cut corners. And keep pets off the surface until full cure. Pawprints in a tacky sealer are permanent reminders.
Budgeting and value: where to spend, where to save
Homeowners often ask where the dollars go. On a typical project, labor dominates, followed by product cost and equipment overhead. Stripping jobs cost more because chemical, labor, and disposal time stack up. Natural stone requires pricier, specialty sealers. You can save by doing routine maintenance washes yourself with a gentle cleaner and garden sprayer, reserving heavy cleaning for pros. If you are searching for pressure washing near me, choose a contractor who understands paver systems, not just a general cleaner. The lowest bid that uses a high-PSI wand and no chemistry is not a bargain when the pavers come out streaked and the joints blow out.
The most cost-effective decision is almost always to prep correctly and seal once, not twice. That means waiting out moisture, hunting down hidden stains before coating, and choosing a product that fits the surface and the climate. Spend a little more on the right paver sealer and skilled application. You’ll spend less in fixes later.
When to call a pro and what to ask
DIY is possible with patience and research, but there are lines I recommend you don’t cross without help. If the surface has multiple layers of old sealer, bring in a pro. If you see widespread whitening or delamination, you need diagnosis and a plan. If you’re mixing sealer types, be cautious. In places like Lutz, local specialists who focus on paver sealing know how to read dew point and schedule around summer storms. When you call for estimates, ask about their washing and sealing sequence, how they handle efflorescence, what products they recommend and why, and what their plan is if weather shifts mid-job. The right answers sound specific, not generic.
A simple decision path for timing and technique
- If pavers are new concrete and unsealed, wait 30 to 60 days, perform an efflorescence wash, ensure 24 to 48 hours dry, sand, then seal with a breathable water-based acrylic or a urethane if you want stronger sand lock.
- If pavers are new clay brick, you can often seal within 14 to 30 days, depending on moisture and weather. Prefer penetrating sealers if you want a natural look.
- If pavers are aged and previously sealed, identify the existing sealer, strip if it is failing or incompatible, deep clean stains by type, dry thoroughly, then select a compatible system.
- If the surface is near a pool or prone to moisture, avoid high gloss and consider grip additive; prioritize breathable products to reduce whitening risk.
- If weather shows high humidity with a low dew point spread, reschedule. You can’t beat physics.
Final thoughts grounded in practice
Sealing pavers is half science, half craftsmanship. The science covers chemistry, moisture, and weather windows. The craft shows in how you stage, how you handle edges, how you back-roll, and how you resist the urge to best paver cleaning company Lutz overapply. When a job goes right, it looks effortless. The color is richer but not garish, the joints are tight, water beads and runs off, and the surface feels secure underfoot. Two years later, a light wash brings it right back.
For homeowners in and around Lutz searching for paver cleaning Lutz or paver sealing near me, vet providers for patience and precision more than speed. A careful pressure washing service that respects your surface sets the stage for a sealer that performs. Whether you’re sealing new pavers for the first time or bringing an old driveway back to life, let timing and technique drive your decisions. The pavers will tell you what they need, if you know how to listen.
Bulletproof Pavers
Address: 1523 Green Meadow Dr, Lutz, FL 33549
Phone: (813) 401-0693