Paver Sealer Troubleshooting: Sticky or Streaky Finish Fixes
Sealer problems show up the same way a bad paint job does. You can ignore them for a while, but every time the sun hits that driveway you see the streaks, the glossy patches, or worse, footprints and tire marks set into a tacky film. I have been called to dozens of homes to diagnose sticky paver sealer, milky haze, splotchy gloss, and roller marks that refuse to fade. Most of these jobs share a handful of root causes: moisture, contamination, incompatible products, over-application, or a rushed process. The good news is that almost every failure has a fix, provided you identify it correctly and move in the right order.
What follows is a field-tested guide to diagnosing and correcting sticky or streaky paver sealer finishes. I will cover how to tell what went wrong, what can be saved, what must be stripped, and how to prevent a repeat. If you are in a humid market like Florida, especially around Lutz and the Tampa area, pay attention to the moisture sections. Between afternoon rain and high dew points, timing and prep make or break a job.
How sealer is supposed to cure
A paver sealer does two things: it penetrates and it forms film. Water-based film-forming sealers use polymer particles suspended in water. As water evaporates, the particles coalesce into a continuous film that bonds to the paver surface and sand joints. Solvent-based sealers dissolve resins in a solvent that flashes off, leaving a harder film. Both need enough time and the right conditions to transition from wet to tack-free, then to full cure. Most sealers hit tack-free in 1 to 4 hours and cure within 24 to 72 hours, but environmental factors matter. If humidity is high or the substrate is cool and damp, that clock slows down dramatically.
A thin, even application allows vapor to escape. A heavy coat traps it. When moisture tries to pass through a sealer film that is not ready, it can leave a milky cast, entrain bubbles, or push oils to the surface. Respect film thickness, temperature windows, and the manufacturer’s recoat time, and most of the headache never starts.
The usual suspects: why finishes turn sticky or streaky
A tacky or streaky outcome almost always ties back to one of these conditions:
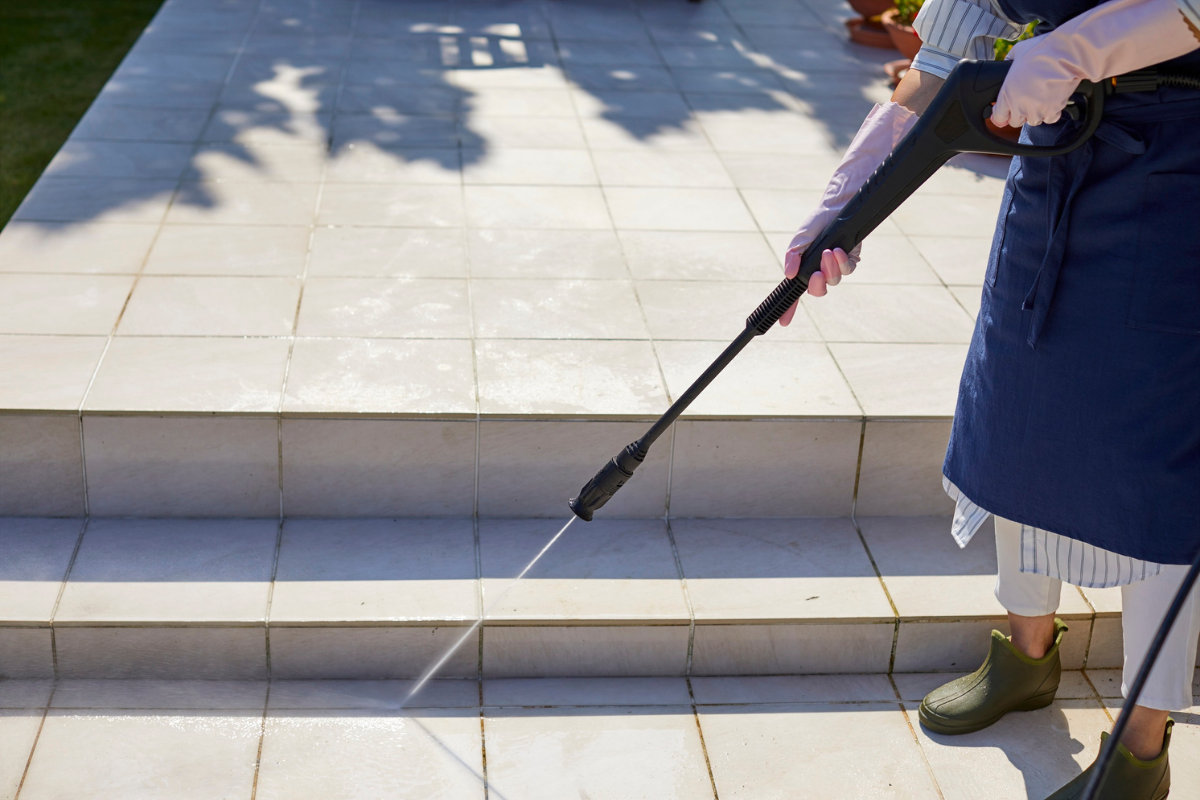
Ambient moisture and substrate moisture. Sealing damp pavers is the fastest path to stickiness and white blush. Pavers can feel dry to the touch, yet still hold moisture deep enough to fight the sealer as it coalesces. In Lutz and similar climates, a surface can dry after a pressure washing service while the core stays damp all day. Sand joints hold water like a sponge. Seal over that and the film clouds or never hardens.
Contamination on the surface. Residual cleaners, efflorescence powder, algae, automotive oils, and even poly sand dust can block adhesion or cause uneven gloss. I have seen projects derailed by a homeowner’s last-minute hose rinse that splashed soil back on the surface.
Incompatible products or trapped layers. Water-based sealer over a glossy solvent base can float and streak. Solvent over a water-based acrylic can bite too aggressively and create wrinkles or orange peel. If an old coat is failing, stacking a new product on top just telegraphs the problems.
Over-application and uneven application. Heavy coats puddle and take forever to off-gas. A roller that is loaded unevenly lays wet edges that flash at different rates, causing bands of gloss. Spraying without back-rolling can leave overspray halos and thin zones that never match the adjacent sheen.
Temperature and sun. Hot pavers skin over fast, trapping solvent or water underneath. A windy, hot afternoon might feel perfect, yet the top cures too quickly, leaving solvents under the film that keep it soft for days. In the shade, the opposite can happen, and you get shiny patches where the film stayed wet longer.
Aging or degraded sealer. If a paver sealer sat on a shelf through seasonal temperature swings, the polymers can destabilize. Shaking helps, but sometimes the emulsion is compromised and never forms a tough film.
First diagnosis: what you can tell in five minutes
Before you reach for strippers or solvents, take a methodical look and perform a couple of non-destructive tests.
Touch test. Press a clean finger onto the surface. Tacky with no transfer suggests slow cure. Tacky with residue transfer suggests uncured or contaminated film. If it feels rubbery and lifts slightly, the top skinned too fast and underlayers are soft.
Visual and angle inspection. Look across the pavers at a low angle. Streaks along roller lines point to uneven application. Milky white patches in random spots signal moisture trapped under the film. A gray haze that follows low areas or joints points to water rising through sand or a high water table.
Water drop test. Sprinkle a few drops of water. If they bead strongly and sit, the film is mostly intact. If they wet out immediately, the film is compromised or extremely thin. If the water turns milky on contact, moisture interaction is still active under the film.
Solvent sniff and small spot test. On a hidden edge, rub a rag lightly moistened with xylene (for solvent-based sealers) or a compatible re-emulsifying solution for water-based products. If the finish softens and evens out, you may be able to revive and level it without stripping. If it wrinkles or sloughs off into strings, the layers are incompatible or overbuilt and need removal.
Document the conditions. Note the weather during application, the time between washes and sealing, product names, and how many coats. If you used a pressure washing service or hired someone for paver cleaning Lutz, ask what detergents or post-treatments were used. A mild post-treatment like sodium hypochlorite can leave salts if not rinsed thoroughly, and those salts affect adhesion.
Sticky finish: rescue techniques before you strip
A sticky film is not always a failure. If the sealer applied too thick or conditions were marginal, you can sometimes bring it across the finish line with controlled intervention.
Increase air movement and shade. Shade the area to reduce direct sun and heat cycling, then run fans across the surface for several hours. Air exchange helps solvents and water escape through micro-pores in the film. This simple step can tip a borderline cure into acceptable hardness by the next day.
Warm the substrate gently. A cool, damp base slows coalescence. On a morning with low humidity, allow the area to warm naturally, or use indirect warmth to nudge off-gassing. Avoid heat guns or open flames. The goal is steady evaporation, not skinning.
Re-emulsify lightly for water-based sealers. Some professional-grade water-based acrylics respond to a light application of the same product diluted per manufacturer guidance, then back-rolled thin to re-level the film. The fresh material softens the surface and allows it to knit. This only works when the sticky layer is not contaminated and the product is designed for it.
Solvent flash for solvent-based sealers. A controlled xylene bath, applied in small sections and back-rolled, can reflow a gummy solvent-based film. This step redistributes and thins the film, allowing trapped solvent to escape. Work in manageable squares, don gloves and a respirator, and keep ignition sources away. If the gummy layer is deep across multiple coats, reflow may just move the problem around.
Topcoat to unify sheen, but only when underlying cure is sound. If the finish feels dry but shows tack or drag in certain bands, a thin unifying coat of the same product can reduce the visual defect. This is a last resort when stripping is impractical, not a fix for soft film. If you can dent the film with a thumbnail after 72 hours, do not topcoat.
These interventions assume the sealer and substrate were broadly compatible and the issue is marginal cure or uneven application. If moisture or incompatibility caused the stickiness, reflowing can worsen the haze or trigger wrinkles. When in doubt, do small test patches and let them sit 24 hours.
Streaky or blotchy gloss: what causes it and how to even it out
Uneven sheen has multiple flavors, and the fix depends on the pattern. Roller chatter leaves parallel bands. Overlap marks show as halos or darker lines along the edges of each pass. Sprayer patterns look like faint clouds or tiger striping. High and low porosity within the pavers themselves will drink sealer at different rates and create patchwork gloss even when you applied perfectly.
If you are confident the film is cured and sound, a leveling coat can help. Add a measured percentage of the manufacturer’s recommended matting agent to knock down the gloss, then apply a thin, consistent pass with a fine-nap roller or proper tip on a low-pressure sprayer, followed by back-rolling. The goal is not to bury the problem under a heavy coat. Your task is to unify optics with minimal build.
Sometimes the streaks are telling you the pavers were never cleaned evenly. High-pressure passes that overlapped or nozzle distance that varied by an inch can etch the surface differently. The sealer only highlights that difference. At that point you need to accept a limit or strip, re-clean, and reseal.
When the white haze shows up: moisture or efflorescence
White or cloudy patches are the most frustrating failures to look at. Moisture blush often appears the day after sealing, especially after a late afternoon application followed by a humid night. Efflorescence haze tends to build over weeks as salts migrate from within the pavers to the surface, crystallizing under or within the sealer film.
If you see widespread milky areas shortly after application, test for moisture by taping a square of plastic to the surface and checking for condensation after a few hours. If moisture is present, the best fix is to let the surface breathe. Shade and airflow help. In mild cases, the haze fades as water finds a path out. In moderate cases, reflowing with solvent or re-emulsification can open the film and release the trapped moisture. Severe cases require stripping.
Efflorescence under a sealed film usually means the pavers were not given enough dry time after washing and sealing, or the substrate has chronic moisture migration. An efflorescence remover can dissolve salts if the sealer is breathable and thin, but if the salts grew under a film-forming sealer, treatments rarely penetrate evenly. You strip, clean, neutralize, and reseal only after confirming the substrate is dry and stable.
Stripping: how to do it cleanly without destroying the pavers
Stripping is a word no homeowner wants to hear, but it is often the fastest route to a reliable finish. Correctly done, it does not harm the pavers. The damage usually comes from using the wrong chemicals, aggressive tips, or sloppy rinsing that drives slurry into lawns and beds.
For solvent-based acrylics, a xylene or aromatic solvent soak lifts many films. Work in sections small enough to control, keep the surface wet with solvent while the film softens, then agitate with a stiff brush and vacuum up the slurry. Follow with a controlled rinse and immediate recovery. Do not blast with a 0-degree tip. You are trying to remove a film, not carve channels.
For water-based acrylics, commercial sealer strippers designed for acrylics are more effective than household products. Apply per label, give it time to dwell, keep it from drying out, and agitate. Heat and sun work against you during dwell. Work in the morning when temperatures are lower.
If multiple generations of sealer are present, expect two passes. The lower coats are often harder and more crosslinked. Judge progress by feel rather than color alone. When the surface no longer feels slick and water wets out instead of beading strongly, you are approaching neutral.
After stripping, give the system a clean reset. Lightly pressure wash with a fan tip, never a pinpoint stream. Rinse plants, collect runoff as required by local regulations, and allow full dry time. In Florida conditions, I look for a 24 to 48 hour window of dry weather before resealing. If the pavers sit on a poorly draining base, extend that window.
Preventing the next failure: prep and conditions matter
What you do before the first ounce of sealer hits the tray sets the finish. A good pressure washing service can help, but even the best wash fails without the right rinse and dry window. If you are searching terms like paver sealing near me or driveway pressure washing near me, vet providers for their process, not just their photos.
Substrate assessment. Identify oil spots, rust, fertilizer burn, and algae blooms. Treat stains with targeted products: degreasers for oil, oxalic or a safe rust remover for rust, sodium hypochlorite solutions for organics. Rinse thoroughly. Any residue left behind can interfere with adhesion or cause discoloration.
Joint management. If you plan washing and sealing in one scope, decide on joint sand strategy. Polymeric sand demands a meticulous blow-down and activation. Residual dust from poly sand is notorious for creating a gritty, sticky film under sealer. I prefer to re-sand with clean, angular sand, vibrate it in, blow off the excess, and only then seal after the sand is bone dry.
Moisture discipline. After cleaning, let the surface dry longer than you think it needs. In humid regions like Lutz, I aim for at least 24 hours of dry, breezy weather after washing before sealing, sometimes 48. Check the base. Pull a paver at a low area if you suspect rising moisture. If the bedding sand is wet, sealing will trap vapor. Sometimes the best move is to correct drainage before cosmetic work.
Product selection. Match sealer chemistry to the use case and the existing film. On driveways that see hot tires, a high-solids solvent-based acrylic or a water-based urethane-modified acrylic holds up better than a soft budget acrylic. For pool decks where slip and heat matter, a low-sheen water-based product with a fine traction additive beats a glossy look that becomes slick. If an old sealer is present, test compatibility in two or three spots.
Application controls. Spraying can be efficient over large areas, but back-rolling evens the film and forces material into pores without leaving thick ridges. Keep roller covers clean and consistent. Mix sealer thoroughly and often. Do not outrun your wet edge in the sun. When the paver temperature climbs above the manufacturer’s limit, stop. Most problems I see come from finishing the last two hundred square feet as clouds roll away and heat rises.
Cure protection. Keep foot traffic off for 24 hours and vehicle traffic off for 48 to 72, longer for high-solids products. Prevent irrigation overspray during cure. One early morning sprinkler cycle can settle mineral-laced water on a soft film and create a permanent ring pattern. Leave clear instructions for family members, tenants, or clients, and if you are the contractor, tape and sign the area.
A field example: rescuing a tacky driveway in Lutz
A homeowner in Lutz called after a weekend DIY project went sideways. He rented a pressure washer, cleaned the driveway, re-sanded joints, and rolled two heavy coats of a big-box water-based paver sealer in a single afternoon. By Monday, the surface was tacky and showed overlapping roller bands. Afternoon storms had blown through both evenings.
The diagnosis was straightforward. The pavers never had a full dry cycle, the joints held moisture, and the application was thick and rushed. The fix started with airflow and shade for a day, which made a small dent. Next, we tested a re-emulsification using the same sealer diluted per the label, applied thin with aggressive back-rolling on a corner. That test area hardened over 24 hours and evened the sheen slightly. We treated the entire surface in small sections, then gave it two dry days with fans. The driveway reached a serviceable hardness, but the gloss remained patchy in sun angles. A final very thin leveling coat with a matting agent unified the optics. It was not showroom perfect, but it was honest about what we could salvage without stripping. The homeowner learned the hardest way that in summer conditions, patience becomes your best tool.
Deciding between DIY repair and hiring a pro
If you can describe the problem in a single phrase and it appeared within a day of sealing, you probably can correct it with the methods above. If you see a mix of sticky areas, white haze, blistering, and obvious patterning across multiple layers, stripping is likely. Stripping safely is labor-intensive and requires chemical handling, runoff control, and uniform technique. That is where a seasoned paver sealing contractor earns their fee.
When you search for paver sealing near me, focus on providers who discuss moisture testing, compatibility tests, and cure protection in their estimate, not just square foot pricing. If you are working around Tampa Bay, look for teams Wet look sealer that understand the local climate’s quirks. Ask about sand strategy, efflorescence history, and how they will handle irrigation and weather windows. Many shops that offer pressure washing also offer sealing, but not all washing and sealing teams hold the same standards. A dedicated pressure washing service that respects dwell times, rinse volumes, and recovery will set up a significantly better sealing outcome than a splash-and-dash company.
Product notes: not all paver sealers behave the same
Water-based acrylics are popular for their low odor, easier cleanup, and decent performance. They tend to be more forgiving over damp substrates than solvent-based products, but still need dry time. High-solids water-based sealers can behave like solvent-based films in thickness and need disciplined application to avoid roller marks.
Solvent-based acrylics give a strong wet look and fast set in dry conditions. They remain the go-to for deep color pop on tumbled pavers and for driveways that see hot tires. Their downside is odor, flammability, and sensitivity to moisture during cure. In tight humidity windows, they blush if applied late in the day.
Urethane-modified sealers and two-part systems offer better chemical resistance and abrasion tolerance. They require precise mixing and have pot life constraints. They are less tolerant of moisture and surface contamination. If you go this route, follow the label to the letter, especially on recoat windows.
Penetrating sealers that do not form a film minimize many of the visual issues described here. They enhance stain resistance without the glossy look. They will not lock sand in the same way and will not produce that deep color pop some homeowners want. The upside is fewer sticky or streaky complaints, and much easier maintenance cycles.
Aftercare that preserves clarity and traction
Once you have an even, cured finish, maintain it like you would a well-waxed car. Rinse dust and pollen periodically. Treat algae early, not after it builds a mat. Avoid harsh degreasers unless necessary, and rinse thoroughly when you do use them. For driveways, place absorbent mats where you park. Hot tire pickup is less likely with quality sealers, but any film can scuff if it runs too hot, especially within the first week.
Recoat cycles vary. In Florida sun, a quality sealer may hold its look 18 to 30 months. High-traffic drive lanes may need attention sooner. Recoat before the film erodes completely. A light maintenance coat on a clean, sound surface is less risky than a rescue on a failing one.
A compact troubleshooting checklist
- Identify the pattern and timing: tacky, streaky, milky, or blistered, and when it appeared.
- Test small: touch, water drop, and a solvent or re-emulsification patch in a hidden spot.
- Improve conditions: shade, airflow, and time before committing to chemicals.
- Rescue thinly: reflow or re-emulsify only if tests succeed, then back-roll lightly.
- Strip when needed: use the right chemistry, control dwell, agitate, and recover runoff.
The bottom line
Sticky or streaky paver sealer is a symptom, not a mystery. Moisture and application thickness sit at the center of most failures, with contamination and incompatible layers close behind. The fixes range from measured patience and airflow to controlled reflow, and when necessary, a clean strip and reset. If you pair disciplined prep with products that fit your conditions, and if you protect the cure, problems become rare. Whether you go the DIY route after learning the craft or hire a specialist after searching for reliable paver cleaning Lutz or a trusted pressure washing provider, insist on process over promises. A beautiful, even finish is not just chemistry in a can. It is a sequence, executed calmly and in the right weather, that respects the way pavers and sealers actually behave.
Bulletproof Pavers
Address: 1523 Green Meadow Dr, Lutz, FL 33549
Phone: (813) 401-0693