Paver Sealer and Joint Sand: What You Need to Know
Driveway pavers look their best on the day they’re installed. The color pops, the joints are tight, and the surface feels solid underfoot. Then weather, irrigation, tires, oil, and weeds start competing for your attention. Sealing and proper joint sanding are how you keep control. Done right, they stabilize the surface, reduce maintenance, and keep your investment looking sharp for years. Done poorly, they trap moisture, turn cloudy, or leave you with crusted sand that refuses to drain.
I’ve spent long Florida summers restoring patios and driveways, from light touch-ups to full reset jobs after heavy settling. The most consistent mistake I see is treating paver sealer like a magic coating and ignoring the joint sand that actually holds the system together. Think of the sealer and the sand as one system. The sand locks the pavers, the sealer locks the sand, and both need the right prep to work.
What sealer really does, and what it doesn’t
Sealer is not a cure-all. It doesn’t glue pavers back into place, and it won’t erase unevenness from a sinking base. What it can do is significant when chosen and applied correctly.
At a minimum, a good paver sealer reduces water absorption, slows down color fade from UV, and makes stains easier to clean. With the right chemistry, it also hardens the top of the joint sand to help resist washout and weed growth. The combination means fewer issues after heavy rain and less sand migrating onto the pool deck or into the garage.
Expect different performance from different chemistries. Solvent-based acrylics deliver strong color enhancement and quick film build, but can trap moisture and turn white if applied too soon after washing. Water-based acrylics and urethane hybrids have improved drastically, allowing breathability and sand stabilization without the heavy solvent odor or high VOCs. Penetrating sealers with silane or siloxane do a great job at water repellence while staying invisible, yet they don’t stabilize joints and they won’t boost color. There are also two-part urethanes used for commercial pavers that create a tough, chemical-resistant film, though they demand dry surfaces and precise mixing.
If your goal is joint stabilization plus moderate to strong color enhancement, a quality water-based acrylic or urethane-modified acrylic is the workhorse. If you only want water repellence on a surface with ample drainage and no need for sand locking, a penetrating sealer can be the right choice.
The unsung hero: joint sand
Joint sand does more than fill gaps. It distributes loads from cars, resists lateral movement, and allows the paver field to flex without cracking. When you see tire shudder marks or hear a crunch under your feet, you’re feeling loose joints. Without enough sand, pavers creep. With hardened joints, they act as a single mat.
Regular washed angular sand, swept and vibrated into the joints, still performs well and gives you wiggle room for future maintenance. Polymeric sand adds binders that harden with moisture. When it’s installed correctly and sealed properly, polymeric sand can be a great defense against ants, weeds, and washout. The trade-off: it demands meticulous cleanup before wetting, and it wants good drainage. Trapped moisture can cause haze, white crust, or soft joints that never cure correctly.
One rule has never let me down. The joint should be sanded to the bottom of the paver’s chamfer, not to the very top edge. This leaves a tiny pocket at the surface for sealer film and water to pass without resting on a brittle sand lip. Filling too high is how you end up with flaking crusts or a jagged ridge after tire turns.
Cleaning sets the stage
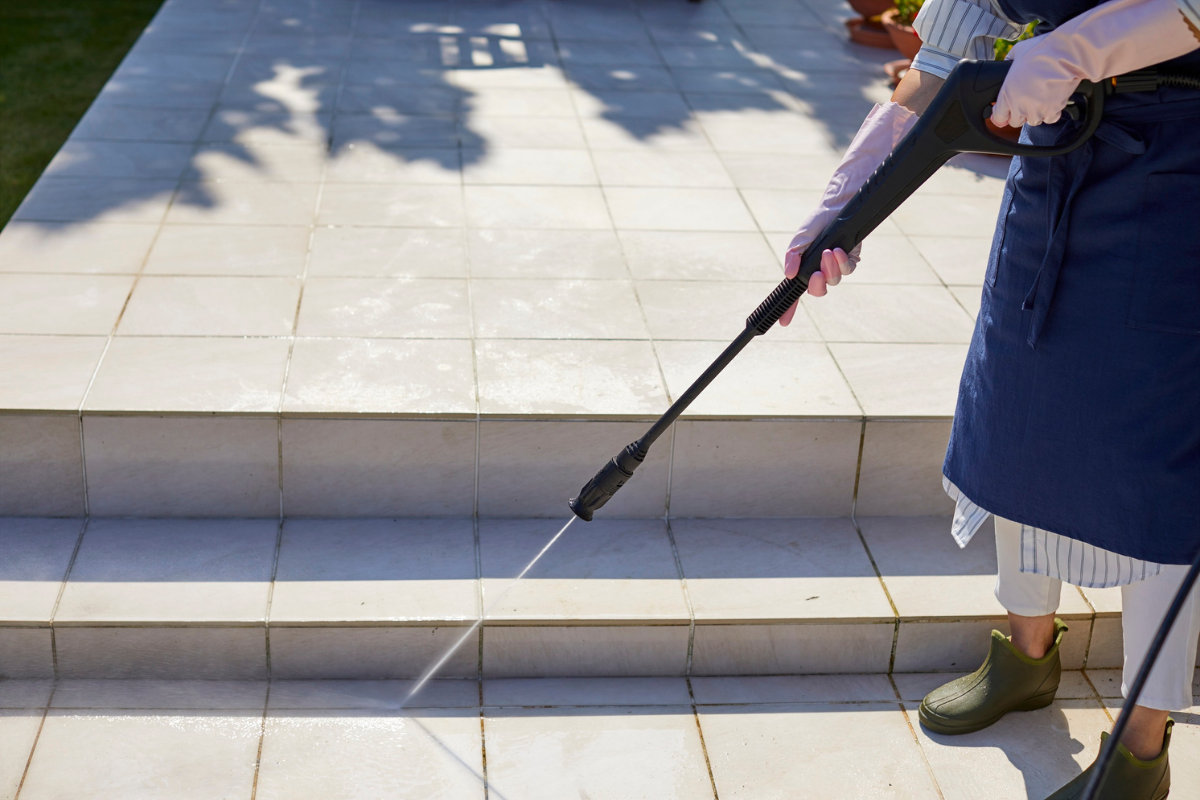
Whether you searched for paver sealing near me or called a local pressure washing service, the result hinges on thorough surface prep. Dirt, efflorescence, and old sealer can block penetration and leave you with blotchy results. I’ve seen more projects go sideways from impatience at this step than from any other mistake.
I prefer a staged process. First, remove loose debris with a blower and stiff broom. Second, pre-treat stains. Rust, oil, and tannins each want different chemistry. A general degreaser for fresh tire marks, an oxalic or specialized rust remover for metal stains, and a targeted cleaner for organic growth. Third, use a surface cleaner connected to a pressure washing unit that can deliver steady PSI without cutting the sand bed. The goal is not to excavate joints, but to rinse them clean of mud and organics. For homeowners searching driveway pressure washing near me, ask the provider what PSI and tips they use. A professional should explain how they avoid etching or gouging.
If there’s old, failing sealer that’s turned milky or is peeling, you may need a stripper. Water-based sealers strip with specific removers and hot water rinsing. Solvent-based coatings can require solvent emulsifiers and careful containment. This is where experienced paver cleaning Lutz crews earn their keep. Stripping is messy, but skipping it often guarantees clouding under the new coat.
After washing and rinsing, let the pavers dry. In a sunny, breezy Florida afternoon, that can be four to six hours on open driveways and a full day in shaded areas. Under cooler or humid conditions, overnight is safer. If you’re aiming to seal a pool deck or shady north-facing walkway, a moisture meter is worth the small investment. Sealing over damp joints is the fastest route to blushing, whitening, and poor adhesion.
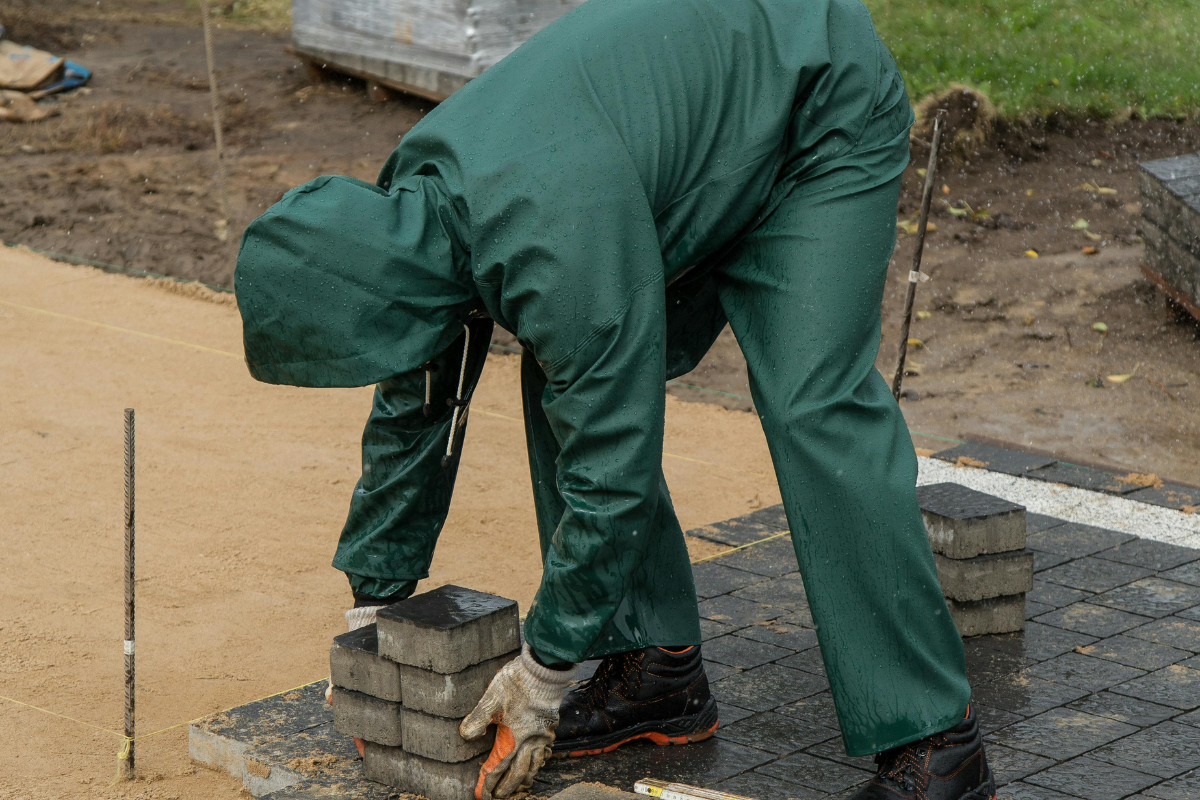
The right way to resand
Once the pavers are clean and dry, resand the joints. Use a clean, angular sand screened to a consistent size. Some contractors use play sand because it’s cheap and easy to sweep. It also rounds off and compacts poorly. You want fractured sand that interlocks.
I sweep in thin passes, then run a plate compactor with a neoprene pad over the surface. The vibration settles the sand deeply into the joints and reveals low spots you would miss by sweeping alone. Repeat until you reach the bottom of the chamfer. Blow off the surface dust, and check soft washing closely around borders, curves, and transitions to concrete. Those areas often need another pass.
If you choose polymeric sand, follow the bag’s moisture and cleanup instructions to the letter. The dust on the paver face must be completely removed before wetting. I’ve seen polymeric haze set on textured pavers when a light film remained after sweeping. Once it cures, that haze can be stubborn, and sealing over it magnifies the problem.
Sealer application that holds up
Even the best product fails with heavy-handed application. The key is thin, even coats on a dry, clean surface with the joints correctly filled.
On most residential driveways, two light coats of a water-based acrylic are better than one heavy coat. Use a quality sprayer for uniform coverage, then immediately back-roll to level the film, work it into the surface texture, and prevent puddling at low points. Watch edges and where pavers meet concrete, pool coping, or drains. Any pooling will dry milky because the film is too thick to breathe.
Sealer should pull into the sand joints as well. That’s how you get stabilization. If the sand is full and dry, you’ll see the sealer slightly darken the joint. For driveways with high traffic, I allow 30 to 60 minutes between coats as temperature and humidity allow. Test tackiness with the back of a gloved finger. If it’s no longer tacky but not fully hard, the next coat can crosslink and bond properly.
Pay attention to weather windows. Wind-blown debris, sudden showers, or morning sprinklers can ruin a finish. I’ll reschedule a job rather than risk a surprise storm. When customers call for washing and sealing, I build two dates into the calendar: a target day and a weather backup. It saves headaches for everyone.
Breathability and the dreaded white haze
White haze is the fear that keeps property managers up at night. It happens when moisture is trapped under a non-breathable film or when a water-based sealer is applied too thick or too early on damp pavers. It can also result from efflorescence migrating up through a freshly sealed surface.
Two habits prevent most haze. First, test for moisture. Concrete and pavers can look dry and still hold water in the joints. Second, use breathable formulations when you’re sealing in humid climates or on pavers set over compacted base with slow drainage. If a client insists on a high-gloss, solvent-rich film, I make it clear that maintenance will be stricter, and we schedule application during a dry stretch.
If haze appears, don’t panic. Sometimes a xylene re-emulsification works on solvent acrylics, and a light recoat with proper prep can fix water-based whitening if it was caused by thinly trapped moisture. If efflorescence is the culprit, the right cleaner followed by a 24 to 48 hour dry period before resealing usually solves it. The worst cases require stripping and starting over.
Color enhancement versus natural look
People tend to want one of three finishes: natural matte, enhanced satin, or wet-look gloss. Each has pros and cons.
Natural matte preserves the paver’s original appearance, adds water repellence, and avoids glare on pool decks. It also hides dust and minor imperfections. Many penetrating sealers and some matte acrylics fall into this category.
Enhanced satin deepens the color without making the surface look artificial. It’s the most forgiving finish in bright sun and suits most homes. A good satin-level water-based acrylic is my default for driveways and patios.
Wet-look gloss delivers that just-rained appearance. It can be stunning on darker pavers and travertine, but it shows streaks and dust faster. On sloped driveways, glossy films can be slippery when damp. If a client insists on gloss, I add a micro-grit additive in the final coat around slopes or frequently wet areas to improve traction.
Maintenance after sealing
Sealer buys you time and reduces effort, but it doesn’t end maintenance. I explain to homeowners that a light rinse every couple of weeks and a gentle pH-neutral cleaner for spills will keep the finish fresher longer. Skip harsh bleach baths unless there’s active algae, and even then, dilute and rinse thoroughly. Oil from vehicles should be addressed quickly with a degreaser. The longer it sits, the more likely it is to shadow.
Expect to reseal every two to three years for water-based acrylics in strong sun, sometimes longer for shaded areas or penetrating sealers. You don’t need to strip every cycle. If the film is intact and not peeling, a thorough clean, dry, and a maintenance coat will refresh the protection and color. When tires start leaving scuff marks that don’t clean easily, or the surface shows patchy darkening after rain, the sealer is telling you it’s time.
Common mistakes that shorten paver life
I keep a running list of problems I’m called to fix. A few patterns show up again and again.
- Sealing too soon after construction or after washing. Fresh pavers often carry manufacturing moisture and efflorescence waiting to bloom. I recommend a 60 to 90 day wait after new installs, then a light efflorescence cleanse and drying before the first seal. After deep cleaning, let the system dry fully before application.
- Overfilling joints and sealing on top of a sand lip. That brittle rim will chip out, leaving small troughs that collect water and dirt.
- Using a one-size-fits-all sealer. Clay brick, concrete pavers, and natural stone behave differently. Clay is denser and often benefits from breathable penetrating products. Concrete pavers accept film-formers well, but still need vapor transmission in humid climates. Travertine is porous and can soak up more product than you expect.
- Ignoring drainage. If water pools at the bottom of a driveway or along a pool edge, no sealer will stop the long-term damage. Regrade or add drainage before sealing.
- Sprinklers on too soon. I schedule with irrigation off for 24 hours after sealing. Early overspray leaves streaks and spots that dry into the film.
What to ask when hiring a pro
If you’re looking up pressure washing or paver sealing near me, a few questions separate a careful contractor from a cowboy with a pump sprayer. Ask what products they use and why. A pro should be able to explain the chemistry in plain language and tailor it to your pavers and climate. Ask how they handle joint sand, whether they compact during resanding, and where they set the final joint height. Ask about dry times and weather windows. If someone promises to wash and seal in two hours start to finish on a damp, shaded driveway, keep looking.
For homeowners in warm, wet markets like paver cleaning Lutz service areas, ask specifically about breathability and efflorescence handling. The combination of afternoon storms and irrigation means your pavers rarely get bone dry on their own. An experienced crew will plan accordingly.
Special situations: pool decks, shaded walks, and heavy-traffic drives
Pool decks demand slip resistance and chemical resilience. Chlorine and salt can degrade certain film-forming sealers. I prefer low-sheen water-based products designed for pool environments and will often broadcast a fine texture additive in the second coat near entries and steps. Keep joints at the bottom of the chamfer to avoid sharp lips, and consider polymeric sand only if drainage is excellent and you can guarantee meticulous cleanup before activation. Pooled water plus polymeric dust equals heartache.
Shaded walkways and north exposures stay wet longer and grow algae faster. Here, breathable sealers shine. You’ll spend more effort on regular cleaning, but you’ll avoid moisture entrapment. A gentle, periodic algaecide can help, but rinse thoroughly and keep it off surrounding plants.
Heavy-traffic driveways with tight turn radiuses pick up tire scuffs and hot-tire pickup. Choose a tougher resin system, and allow full cure before driving on the surface. A common mistake is letting cars back on within six hours. Many products need 24 to 48 hours for a full crosslink. If weekend schedules are tight, plan an early Friday start and a Sunday afternoon open.
Efflorescence: manage it, don’t seal it in
Efflorescence is the white, powdery deposit that shows up as salts migrate to the surface and react with paver sealing contractor carbon dioxide. It’s more pronounced on new pavers and after heavy rains. Sealing over active efflorescence traps it, then it keeps pushing under the film, creating blotches or clouds. Clean it with the correct efflorescence remover, neutralize if the chemical requires it, rinse thoroughly, and allow a patient dry time. I like to give it at least 24 hours of good weather after treatment before sealing, longer if humidity is high.
Why density and texture matter
Not all pavers absorb the same amount of sealer. Dense, smooth-faced pavers take less product per square foot and show roller marks if you aren’t careful. Tumbled or textured pavers drink more and hide application patterns. On dense surfaces, light coats and cross-hatching with a fine-nap roller produce the best look. On porous surfaces, plan for a slightly higher spread rate and watch for hungry joints that draw in too much sealer on the first pass.
Natural stone introduces another variable. Travertine likes penetrating sealers that fill micro-pores and resist pool chemicals. If you opt for a film-former on stone, use products formulated specifically for it. Heavy generic acrylics can create plastic glare that undermines the stone’s elegance.
When to reset instead of reseal
Sealer and sand are not a substitute for a failed base. If you can rock pavers with your foot, see differential settling, or find that large areas hold standing water, it’s time to lift and reset. That means removing pavers, rebuilding the compacted base and bedding layer, and reinstalling. Sealing a failing system is like waxing a car with a bent frame. The shine won’t last, and you’ll spend more fixing what could have been addressed once.
A quick field check helps. Place a straightedge or a long level across suspect areas. If you see more than a half-inch deviation over a few feet, and it’s not due to intended drainage slope, you’re beyond what sand and sealer can correct.
Costs, expectations, and realistic timelines
Pricing varies by region, access, and condition. For a typical residential driveway, washing and sealing with joint resanding can range widely, often landing between a few dollars and up to several dollars per square foot depending on stripping needs, sealer type, and whether polymeric sand is used. Complex pool decks with screen enclosures and lots of cut-ins take longer and cost more. If a contractor gives a flat price without seeing the site, they’re either overcharging to cover risk or underbidding and planning to cut corners.
Timelines matter. A well-managed job stages efficiently: day one for deep cleaning and drying under favorable weather, day two for resanding and sealing, then cure time. On fast-drying summer days, it is possible to clean in the morning and seal in the late afternoon, but only with excellent drainage and sun. Patience beats a redo.
DIY or hire it out?
If you’re handy, comfortable with a pressure washer, and willing to test on a small area, you can do a basic clean, resand, and seal on a small patio. Get the right tools: a surface cleaner, a moisture meter cost to seal pavers Lutz if you can, a quality sprayer and roller, and personal protective gear. Respect the cure times. Test your chosen product on an inconspicuous area to confirm the look.
For large driveways, pool decks with delicate enclosures, or surfaces with previous coating failures, experience pays for itself. The cost of stripping a bad seal is higher than doing it right once. A reputable pressure washing service that specializes in paver sealing will discuss products transparently, show photos of similar projects, and outline their weather and irrigation plan. The best crews communicate clearly, show up with containment gear for chemical runoff, and leave the site as tidy as they found it.
A practical, minimal-care routine
You don’t need an elaborate maintenance calendar to protect sealed pavers. Keep it simple. Rinse blown sand and leaf debris every week or two during dry seasons. Spot-clean oil or rust as soon as you notice it. If weeds appear, pull them rather than blasting them with caustics that can etch or strip. Schedule a professional wash every six to twelve months if your area collects heavy organic growth or if irrigation draws iron out of the water and leaves orange stains. A light maintenance coat of sealer every few years keeps the system topped up without heavy prep.
For those searching washing and sealing or pressure washing nearby, ask for a maintenance plan upfront. It’s easier to budget and it keeps your pavers out of the boom-and-bust cycle of ignore, panic, over-correct.
The payoff
Pavers are a premium surface. They add curb appeal and make outdoor spaces feel intentional. With the right joint sand and a well-chosen sealer, you lock in that look and feel while cutting your workload. The process rewards patience and attention to detail. Clean thoroughly. Let it dry. Sand correctly. Apply thin, even coats. Protect the cure window. If you hire a pro, choose one who treats pavers as a system rather than a surface. Whether you’re in a humid Gulf community calling for paver cleaning Lutz or searching for driveway pressure washing near me after a dusty season, the fundamentals stay the same. Respect the role of joint sand, pick a sealer that matches your conditions, and the result will hold up through sun, rain, and the daily rhythm of life on your hardscape.
Bulletproof Pavers
Address: 1523 Green Meadow Dr, Lutz, FL 33549
Phone: (813) 401-0693