Sealing Older Pavers: Restoration Strategies That Work
Patios and driveways age the way houses do, quietly, then all at once. A surface that looked tight and even a decade ago now collects sand in the corners, the color has bleached out, and weeds find every weak joint. When you walk it after rain, the pavers feel loose in spots and the sand pumps up between your shoes. That is the moment owners go searching for paver sealing, and it is also where plenty of projects go sideways. Older pavers can be brought back, but you need a clear-eyed assessment and a process that respects what time and weather have done.
I have cleaned, repaired, and sealed thousands of square feet of brick, concrete, and natural stone. The most memorable jobs are the older ones where careful washing and sealing not only preserved the surface but improved it. The difference came from reading the material, not forcing a one-size-fits-all paver sealer, and knowing when to fix problems before we lock them under a film. The strategies below reflect that experience, from evaluating the substrate to choosing chemistry and dialing in the application.
What age really does to pavers
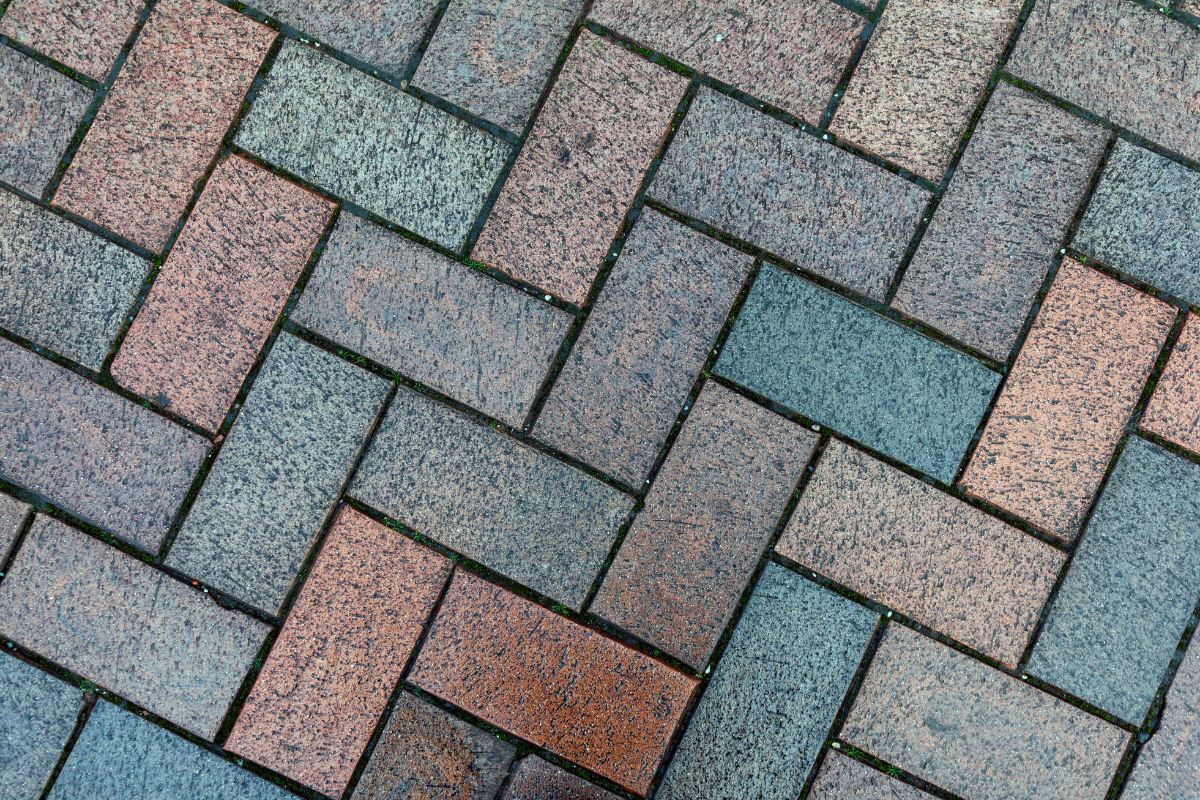
Age changes both the face of the paver and the structure beneath it. Concrete pavers lose fines at the surface, which opens micro-pores and accelerates water absorption. UV light breaks down pigments. The joints lose polymeric binders and the sand migrates, especially where water runs. In freeze-thaw regions, edge spalling shows up as ragged corners. In the Southeast, mildew and algal growth dominate shaded areas. Driveways pay a different tax: automotive oils, tire scuffs, and hot-tire pickup that removes weak sealers.
You can see the aging in several patterns. Efflorescence looks like a chalky haze that returns even after washing because moisture moving through the paver keeps pushing salts to the surface. Iron oxide stains from sprinkler water leave orange fans near heads. Where gutters dump, the joints erode and pavers settle in a saucer shape. If you apply a heavy, film-forming sealer over any of this without preparation, you trap moisture, amplify whitening, and risk delamination. Good restoration starts with a diagnosis, not with a drum of product.
The inspection that pays for itself
I walk every job with a notepad and a screwdriver. The notepad keeps me honest about square footage, drain paths, and transitions. The screwdriver is for joints and edges. If I can sink the tip into soft joint sand and lift it out damp, we need a deeper drying window and probably a joint replacement. If the edge restraint flexes when I pry it, we have movement that sealing alone cannot solve. Wearing a clean glove, I rub a paver face to see if fine sand dusts off. That tells me how aggressive I can be with pressure washing and whether a consolidating sealer would help.
I also check grade and water behavior. If water sits longer than 30 minutes after a garden hose test, moisture vapor pressure may be too high for dense coatings. In warm, humid markets like Lutz, Florida, where paver cleaning Lutz searches often lead homeowners our way, this matters more than most think. The climate rewards breathable chemistry and patient drying.
Finally, I map stains. Rust, leaf tannins, motor oil, and paint all need specific cleaners. If I see white blotches beneath a previous coating, I plan to strip it. If there is no coating but the pavers have a polished shine, it is often trapped efflorescence crystals, not gloss. All of this influences washing and sealing choices.
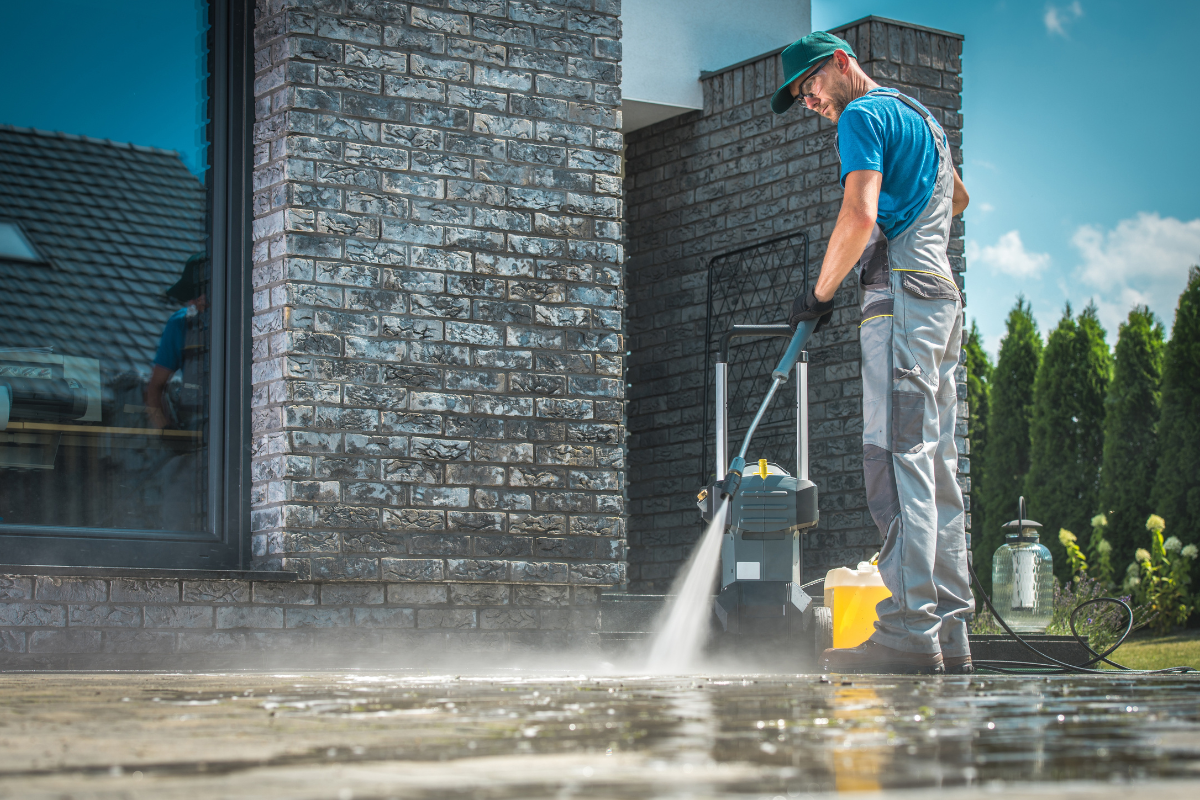
Cleaning is not just about pressure
Plenty of projects get over-washed. Raw pressure is seductive, and you can carve mortar out of a joint with a 4 gallon-per-minute unit before you realize it. The goal is consistent, controlled removal of contaminants without eroding surfaces. A pressure washing service that understands pavers will think in terms of chemistry first, then nozzle and technique. I prefer rotary surface cleaners for large fields because they keep standoff distance constant and minimize striping, with a rinse wand for edges and tight areas. Two or three passes at reasonable speed often beat a single aggressive pass.
Chemistry earns its keep. A mild alkaline detergent lifts organic grime. Sodium hypochlorite, used carefully, removes mildew without burning lawns, though I pre-wet plants and neutralize rinses as needed. Degreasers saponify oil stains, but deep oil may require poulticing if it has soaked into porous concrete pavers. Iron stains from sprinklers respond to oxalic or specialized iron removers. Efflorescence is trickier. I use proprietary acid blends designed for pavers, not straight muriatic acid, and only after a thorough pre-wet and a controlled dwell time. The mistake that leaves scars is applying acid to a dry, hot paver or letting it sit too long. If you can smell acid strongly after a minute, you probably over-applied.
After washing, I look again at joints. If the wand has blown out sand to the point that joints are below the shoulder of the chamfer, we need to re-sand. Skipping this step is why older patios start wobbling a year after a wash. The joints distribute load and limit lateral movement, so proper refilling affects the life of your sealing work.
Joint sand sets the stage
Older pavers often have a blend of sand sizes packed in the joints from years of top-offs. For restoration, consistency helps. Washed, angular sand that meets ASTM C144 or manufacturer specs for polymeric sand reduces settling. I sweep it in dry, vibrate the field with a plate compactor fitted with a neoprene mat to drive it deep, then top up and vibrate again. This gets the sand down to within a few millimeters of the paver face.
Polymeric sand earns its reputation when applied right. It resists weeds and ants better than plain sand because the binder hardens the surface of the joint, though it is not concrete. The pitfalls are predictable: too much water during activation, not enough water, or rushing water across the surface that washes binder onto the pavers. I mist in stages until the joints darken consistently. If the pavers are very porous, I reduce mist volume but repeat more times. On older, soft pavers, this control prevents sand pullout during the first rain.
Timing matters. In warmer weather, polymeric products often set to light foot traffic within a few hours, but the safe window before sealing is longer. I prefer at least 24 to 48 hours of dry weather after activation before applying a sealer, longer if humidity is high or temperatures are below 70 degrees. Joint moisture trapped under a non-breathable film is a recipe for haze.
Choosing the right sealer for older surfaces
Ask five pros about the best paver sealer and you will get eight opinions. The common mistake is to assume the highest-gloss, hardest film is always best. Older pavers benefit from compatibility more than from gloss. I group options by chemistry and by how they interact with moisture and porosity.
Water-based acrylics have improved dramatically in the last decade. Good products coalesce into a breathable film that repels water, enhances color modestly, and can be re-coated without stripping when properly prepped. They tolerate a bit of moisture in the substrate, which makes them a strong option for humid climates and for older pavers that wick ground moisture. Solvent-based acrylics tend to deliver richer color and higher gloss, and they re-dissolve into their previous film during recoat. They also carry a higher risk of whitening if moisture is present and can soften under hot tires if the solids content is low or the resins are poor.
Penetrating sealers, such as silane, siloxane, or blends, do not form a film. They reduce water uptake and help control efflorescence, but they do not lock in joint sand or add color. On older pavers with persistent moisture issues, they can be the least risky, particularly under heavy shade. Some hybrids combine penetrating repellency with light surface film. Urethanes and two-part epoxies are rarely appropriate for aging pavers outdoors unless the substrate is very dry and stable, because they are less forgiving and can trap vapor.
I keep a small kit of test products. On a 2 by 2 foot area, I apply a single, light coat, let it cure, and hose test two days later. If the sample beads water uniformly and the color enhancement is acceptable without whitening, we continue. If any patch hazes, I try a more breathable option. Homeowners who search paver sealing near me often focus on cost, but this 30-minute test prevents expensive rework. It also reveals how thirsty the pavers are, which helps calculate coverage. Older, open surfaces may absorb 150 to 250 square feet per gallon on the first coat, then 250 to 350 on a second.
Application that respects age and weather
Great sealing jobs feel uneventful. The process is clean, the edges are crisp, and the finish looks like the pavers themselves, just healthier. I prefer a low-pressure sprayer and a microfiber T-bar or roller for control. Spraying alone can leave micro-puddles in the low texture of old pavers. Back-rolling evens it out, pushes product into pores, and reduces lap marks. For joint stabilization with certain acrylics designed for washing and sealing in one system, the first coat should be wet enough to soak into the top of the sand without pooling, which means a slightly slower pace and watchful eyes.
Weather windows create anxiety, especially during rainy seasons. The rules of thumb hold: surface and air temperatures between roughly 50 and 90 degrees, no rain in the forecast for at least 24 hours, longer for solvent systems, and lower wind to avoid overspray and flash-off issues. In Florida’s summer humidity, I have delayed jobs even with a clear forecast because dew alone can dull a fresh coat. In cooler climates with freeze-thaw, aim to complete sealing at least a couple of weeks before consistent overnight freezes begin. Moisture inside the paver that freezes under a new film can expand and cause flaking.
One more thing about driveways. Tires can scar a new film if you park too soon. Water-based acrylics often reach light vehicle readiness within 48 to 72 hours, but that depends on film thickness, temperature, and airflow. Solvents may cure faster on paper, but entrained moisture complicates that. I tell clients to give us a long weekend, park on the street, and avoid tight turns for a week. People find this patience easier when they have just watched a careful, clean process rather than a rush job.
Dealing with pre-existing coatings
Older pavers often wear a patchwork of past efforts. You can see glossy islands, milky sections, and bare areas where traffic removed coating. Putting a new product over that is like painting over peeling paint without sanding. I test for compatibility by rubbing a solvent on a rag over a discrete spot. If the old film softens readily and looks like acrylic, I can often re-emulsify it with a compatible solvent-based acrylic and even it out, but only if the underlying film is bonded. If it powders or flakes, I strip.
Stripping is tedious and messy, and it separates careful pros from casual operators. The safest approach is a commercial stripper designed for decorative concrete and pavers, applied in shade, kept wet long enough to release the film, then removed with low to moderate pressure and captured where necessary. Heat and steam can help on stubborn patches. I avoid grinding or aggressive blasting on concrete pavers unless there is no other option, because it roughens the surface permanently and invites dirt. Plan extra time for rinsing and neutralizing after stripping. Residual stripper can interfere with new adhesion.
Color restoration and enhancement
A common reason people want paver sealing is to bring back color. Older concrete pavers lose saturation as fines erode. Acrylics can deepen color, but they are not paint. The enhancement is usually a one or two shade bump. If the pavers are mottled from wear, you will get a richer version of that mottling. Some projects benefit from a color-tinted sealer, yet I rarely recommend tinting for weathered pavers that have uneven wear, because tint tends to highlight the differences. In small test areas, a natural luster water-based finish often looks better months later than a high-gloss solvent that seems dramatic on day one and then shows whitening in damp seasons.
Natural stone pavers like travertine and shellstone behave differently. They take penetrating sealers well and can look garish under high-gloss films unless that is an intentional design choice. Older dense stone resists penetration, so coverage goes up and performance down with film formers. An impregnating sealer preserves the stone look and reduces maintenance, especially with irrigation overspray. If you have a mixed field of concrete pavers and stone bands, treat them differently rather than forcing a single product across both.
Addressing efflorescence for the long haul
Efflorescence is water-soluble salt, and it needs moisture movement to appear. I attack it in three ways. First, I improve drainage. Even small adjustments to downspouts, ground slope, and where irrigation heads spray cut the highway that moisture uses. Second, I clean with the right acids and rinse thoroughly, then allow a real dry-down period. Third, I use a breathable sealer that slows water entry without sealing vapor in. Film-forming sealers that block most water can still let vapor push up from below, which is why you see hazing under dense coatings. For older pavers on a damp base, penetration and breathability win. If clients push hard for a wet look, I explain the trade-off and show examples of projects six months and one year later. Most choose sanity over shine when they see the evidence.
When pressure washing solves more than you think
Sometimes the best restoration is restraint. I have had projects where the owners asked for a high-gloss look, but the pavers were soft and the joints exhausted. After a careful pressure washing with a surface cleaner and calibrated chemistry, we re-sanded with polymeric, tightened the edges with new restraints, and stopped there. The surface looked honest, clean, and unified. The next year, we sealed once the joints had held and the owners had lived with the natural look. If you are searching driveway pressure washing near me because your driveway looks shabby, be open to a phased plan. Older surfaces reward patience.
A professional pressure washing service should schedule work around shade and temperature, protect surrounding landscaping, and manage wastewater where required by local codes. Cheap work shows up in burnt grass, etched screens, and stripes across pavers. Skilled washing sets you up for sealing success.
Maintenance that multiplies life
Once sealed, older pavers are easier to keep clean, but neglect can still shorten their life. Irrigation water is the silent spoiler. If sprinkler heads overspray, especially with rusty well water, stains return quickly. Adjusting heads, adding simple drip along beds, or using iron filters often costs less than a single restorative cleaning. Keep debris off the surface. Leaves, berries, and pet accidents can etch or stain, particularly under sun. A quick rinse does more than you think.
The maintenance interval depends on traffic, sun, and chemistry. In sunny, low-traffic patios, good water-based acrylics often look right for two to three years before a light refresher coat helps. Driveways with daily traffic may want attention every 18 to 24 months. Penetrating sealers last three to five years in many settings, but since they do not change appearance, owners forget the calendar. Build reminders. When a client calls for paver cleaning Lutz or surrounding towns, I check our notes for the last seal date and plan a recoat before the surface is tired. Recoats applied while a film is healthy bond better and require less product than waiting until the surface is bare again.
Edge cases, failures, and fixes
Not every older paver project is a candidate for sealing in its current state. If the base has settled broadly or heaved, sealing traps cosmetic problems under a glossy skin. Re-laying the field or at least addressing the base along the worst zones is smarter. If you have persistent damp from a high water table, any film-forming sealer will be stressed. Stick with penetrating options and accept a more natural look. If white haze shows up days after a solvent-based application, you can sometimes reverse it with xylene re-emulsification to open the film and release moisture, followed by a slower-cure recoat, but that is a job for someone who knows the product chemistry.
Weed growth after polymeric re-sanding and sealing frustrates owners. surface cleaner attachment Most of what people call weeds are windblown seeds sprouting in dust that accumulates at the joint edge, not roots driving up from below. A firm joint reduces growth but does not eliminate it. A quarterly blower pass and a brief hand-pull of sprouts keeps joints clean. Ants can tunnel through even polymeric sand in sandy soils. A professional can treat nests before re-sanding and consider a sand with more binder content in problem areas.
Hot tire pickup is another failure point. It comes from a combination of soft film and high surface temperature. Dark pavers in full sun can reach 140 degrees. When a car parks after highway driving, the tire surface is hot enough to soften weak acrylic resins. The fix is twofold: choose higher-solids, better-resin products and keep film thickness moderate. Two lighter coats cure more completely than one heavy coat, especially on older pavers that breathe moisture.
Choosing a partner who respects the craft
If you are comparing bids from washing and sealing providers, ask a few grounded questions. What is their process for dealing with efflorescence? How do they decide between water-based and solvent-based acrylics? What coverage rates do they expect on first and second coats for your pavers? How long do they wait between joint sanding and sealing? Strong answers demonstrate understanding, not brand loyalty alone. When someone leads with a promise of maximum gloss at minimum cost, be cautious. When they talk about moisture, vapor, and why a breathable approach might save you trouble, you are likely in better hands.
Finding the right team is easier than it used to be. A quick search for paver sealing near me or pressure washing turns up options, and reviews reveal patterns. Look for projects similar to yours in age and material, not just new installs. Ask to see a sample area sealed on your property. Any reputable pro will oblige, because they know testing is cheaper than repairing.
A practical, field-tested workflow
Here is a concise, real-world sequence I use for older paver restoration. This is the only checklist in this article, and it assumes a dry forecast and pavers in restorable condition.
- Inspect the field, joints, edges, and drainage, then spot-test stains and any existing coating for compatibility.
- Pre-wet landscape, apply appropriate cleaners, and pressure wash with a surface cleaner, followed by a careful rinse.
- Allow to dry, re-sand with polymeric or washed sand, vibrate, top off, and activate with controlled misting.
- After a sufficient dry-down period, test small areas with candidate sealers, then apply chosen product in two light coats with spray and back-roll technique.
- Cure fully before traffic, adjust irrigation to reduce overspray, and schedule maintenance reminders based on use and exposure.
Each line hides judgments you only learn by doing. That is the point. Older pavers do not need a miracle, they need sequence and respect. Your driveway or patio can look better than you remember, and it can hold that look with simple care.
Where pressure washing fits into the bigger picture
Pressure washing is the muscle of the process, but it is not the whole body. A good pressure washing service recognizes when to back off pressure and let chemistry work, uses the right tips and flow to lift dirt without shredding joints, and treats rinse water responsibly. Homeowners searching driveway pressure washing near me often focus on the clean, not the aftermath. The aftermath matters more. Without re-sanding, sealing, and small fixes to drainage and irrigation, the clean fades fast. Done together, washing and sealing create a durable system that resists water, slows UV damage, and makes routine rinsing enough for most of the year.
Final thoughts from the field
The best restoration projects end with homeowners walking the surface at dusk, noticing the way the color returns without looking plastic, feeling the joints locked and even underfoot, and seeing water bead instead of soak. That outcome is not luck. It comes from testing, the right paver sealer for the conditions, respect for moisture, and a steady hand. If you are in a hot, humid area like Lutz and call about paver cleaning Lutz or general paver sealing, expect your pro to talk about breathability and drying windows more than shine. If you are in a cooler, drier region, your choices open up, but moisture still wins arguments.
Pavers age. That is not a flaw. The restoration that works acknowledges age, builds on it, and leaves you with a surface that looks lived-in and loved, not dipped in plastic. Whether you roll up your sleeves or hire out, aim for that standard. The rest falls into place.
Bulletproof Pavers
Address: 1523 Green Meadow Dr, Lutz, FL 33549
Phone: (813) 401-0693