Pressure Washing vs. Soft Washing: Which Is Best for Your Pavers?
If you own a brick or concrete paver driveway, you’ve probably watched the color fade and joints turn black over a few seasons. Florida sun bakes in tire marks. Irrigation sprinkles minerals that leave white crust. Shade breeds algae that turns buff pavers green. Nothing changes the look faster than a proper cleaning, but methods matter. Use the wrong approach, and you can strip sand from joints, scar the paver cleaning surface, or trap stains under a sealer. Use the right approach, and those same pavers look brighter, tighter, and easier to maintain later.
I’ve cleaned and sealed pavers across subdivisions and older properties from Lutz to Land O’ Lakes, and the most common question is always the same: should you pressure wash or soft wash? The honest answer is not a single method, but a deliberate combination based on the condition of your surface, the type of paver, and your end goal. If you’re thinking about paver cleaning Lutz homeowners tend to need, this guide lays out the practical difference and how to decide case by case.
What pressure washing actually does to pavers
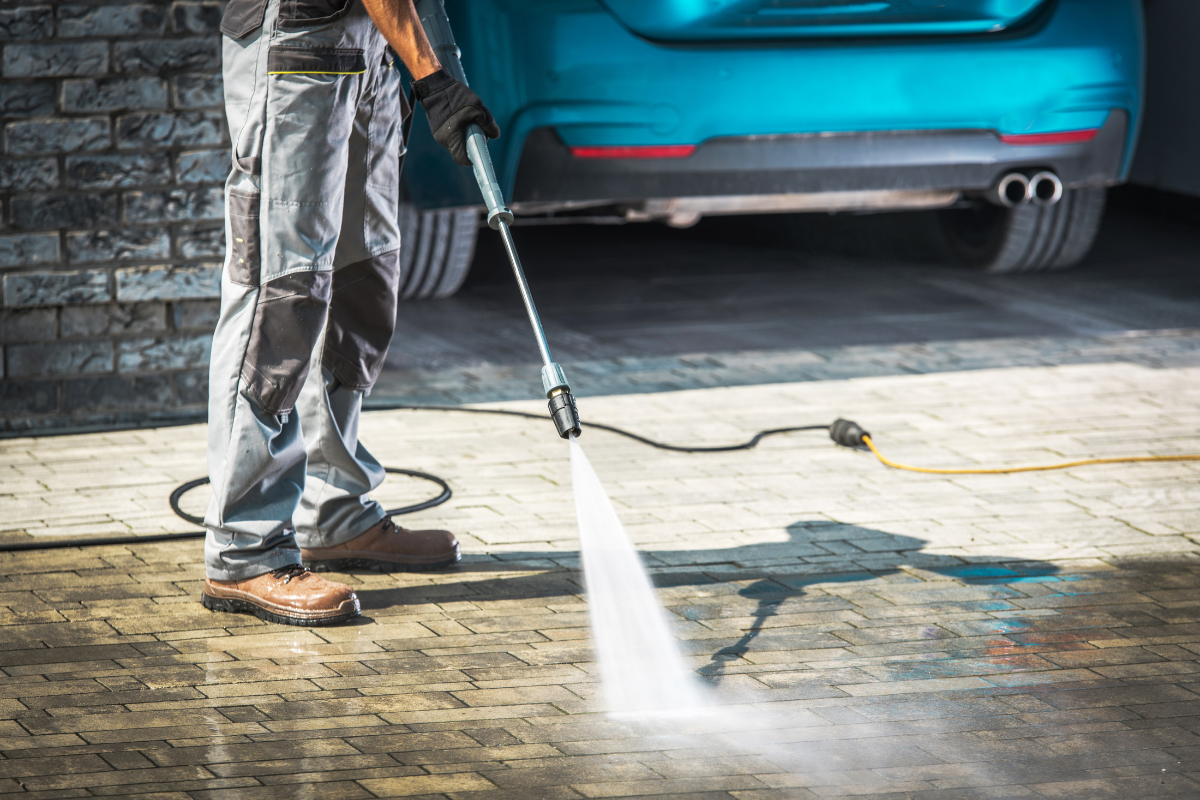
Pressure washing uses a pump to push water at 1,500 to 4,000 PSI through a nozzle. On pavers, that kind of force can blast out organics, loose sand, and embedded grime. If you’ve ever seen a fan tip carve a stripe into concrete, you’ve seen why control is everything. On a paver driveway, I rarely use a bare wand except for edges. Most of the time, a surface cleaner with controlled jets keeps the pressure uniform and minimizes etching. The best units hover over the surface with a skirt that reduces overspray, so you don’t coat the garage door with muck.
Pressure washing is mechanical cleaning. Think of it like a stiff brush driven by water. It works well for rubber transfer from tires, mold on the face of concrete pavers, and mud caked into texture. It also lifts polymeric sand if the joints are failing or were never properly cured. That’s both a blessing and a curse: good if you plan to re-sand and seal, bad if your goal is a quick spruce-up before guests arrive.
There are risks. Too much pressure or the wrong tip can scar the paver face, especially on tumbled brick or older concrete pavers where the cement paste has softened. You can also drive water into the bedding layer if you dwell too long, which may cause temporary heaving in poorly drained areas. In warm climates, that usually settles in a day or two, but it’s something to avoid on new installations.
What soft washing does differently
Soft washing uses low pressure, often garden-hose pressure or a gentle pump, to apply cleaning solutions that do the heavy lifting. The common approach for pavers is a sodium hypochlorite blend tailored for organic growth, paired with a surfactant that helps the solution cling and dwell. The chemistry kills mold, mildew, and algae instead of just knocking it off the surface. Rinse, and the pavers look brighter without the blast.
Because the pressure is low, soft washing protects the paver face and leaves joint sand mostly undisturbed. That makes it ideal for maintenance cleanings between sealing cycles or for decorative pavers with a softer surface. The limitation is that soft washing will not remove thick petroleum-based stains or heavy rubber transfer by itself. It also won’t level high spots or knock loose an old, failing sealer. For those problems, you need either targeted spot treatments or controlled pressure.
I lean on soft washing around pool decks, travertine, and loose joint systems where the client wants to avoid joint disturbance. On dense natural stones, you have to calibrate the chemistry and rinse thoroughly, since porous surfaces can absorb more solution.
Cleaning isn’t just about looks, it’s about sealing
Most clients ask about cleaning because the pavers look tired. The bigger reason to clean correctly is what comes next. If you plan on paver sealing, the prep determines how long the finish lasts. Sealer is like clear paint: it needs a clean, dry, and stable surface. If algae remains in the pores or joint sand is saturated, the sealer can haze, trap moisture, or peel.
A pressure washing service focused on pavers should talk about the full sequence: clean, address stains, flush and dry, re-sand, then seal. That washing and sealing workflow sets expectations and ensures you don’t push ahead with a sealer before the surface is ready. If you’re searching paver sealing near me, pick a company that explains how they’ll manage each stage, not one that only quotes square-foot pricing.
The paver type dictates the method
Not all pavers respond the same way.
Concrete pavers are durable, but their faces vary. Smooth-faced units handle pressure better. Tumbled or antiqued pavers have more relief and a thinner cement paste at the surface, which makes them easier to scar. For these, I keep PSI moderate and let chemistry do more work. If efflorescence has bloomed, you may need a post-clean acid neutralizer or a dedicated efflorescence remover before sealing, and that must be done with care.
Clay brick pavers are dense and can take higher pressure, but the joints are the weak point. If you blast the sand, you’ll spend more time re-sanding. Soft washing with targeted pressure on tire marks usually wins here. Algae loves the pores in older brick, so a mild biocidal mix followed by low-pressure rinsing gives a better long-term result.
Natural stone pavers like travertine and limestone can etch with the wrong chemistry and chip with excess pressure. I use soft wash techniques with pH-appropriate cleaners and lots of rinse. If the stone has open voids, high pressure simply drives dirt deeper. Sealer choice also changes here, since a breathable penetrating paver sealer is often safer than a film-forming product.
Where each method shines
I think about the dirt we’re dealing with before choosing a path.
Organic growth in shade calls for soft wash. You want to kill the colonies and clear the pores, so an appropriate solution with a controlled dwell time is key. A surface cleaner rinse finishes the job.
Tire marks and black transfer on driveways do better with pressure. I’ll pre-treat with a degreaser, then run a surface cleaner at sensible PSI. That approach reduces the chance of scalloping and saves time. If you looked up driveway pressure washing near me and saw photos of uniform, overlap-free results, that’s usually a surface cleaner in action.
Efflorescence or mineral stains need specialty products. Pressure alone won’t remove calcium blooms or rust leaching from irrigation. You need the correct chemical sequence, neutralization, and a gentle rinse. This is one of those times when soft techniques outclass brute force.
Old sealer failure or whitening often requires stripping. That’s a different animal entirely. Sometimes you can soften and lift with stripper and moderate pressure. Other times, especially with multiple layers of failed acrylic, it becomes a labor project. If your pavers show blotchy gloss and white haze, set expectations. You may need two passes and still have faint ghosts.
The Lutz factor: climate, water, and shade
In Lutz, we live with heat, humidity, and frequent summer storms. That trio means your pavers stay damp longer, organic growth rebounds faster, and irrigation runs more often. Groundwater carries minerals that leave a chalky film where sprinkler heads overspray the driveway. Oak pollen pastes itself into joints. Your cleaning schedule should match that reality.
On north-facing or tree-covered driveways, I recommend a lighter, more frequent soft wash to control algae between larger maintenance cycles. In full sun with regular vehicle traffic, you can go longer between deep cleans, but tire marks and oil spots need prompt attention. For clients near ponds or with heavy landscaping, I use plant protection steps as a matter of course: pre-wetting, controlled application, and post-rinse. Good rinsing and neutralization prevent leaf burn, and if your property has a delicate bed of bromeliads, say so at the estimate so the crew can tarp and route runoff.
How washing influences re-sanding
Joints hold your system together. When a crew pressure washes without care, you’ll see visible troughs and loose paver edges after drying. The right way is not to avoid joint disturbance entirely, but to manage it. If your joints are already low or cracked, I plan to flush them out deliberately, dry the system, and sweep in fresh sand to the correct depth below the chamfer. That gives the sealer something to lock. If the joints are in great shape and you just want a fresh look, soft washing preserves what you have.
Polymeric sand adds another layer of decision-making. If the prior installer overwatered or undercured the polymer, the top crust often flakes during cleaning. In that case, you either remove and replace, or live with patching. A professional should tell you what they find as they begin, not when you’re standing on a driveway that suddenly needs more materials.
What to expect from a professional cleaning and sealing sequence
From first walk-through to sealed surface, the scope has predictable steps that can be adapted to your pavers and goals.
- Evaluation and testing: Identify paver type, condition of joints, presence of efflorescence, tire marks, or oil. Spot test chemistry on a small area.
- Pre-treatment and soft wash: Apply appropriate solutions for organics or oils, allow dwell, agitate where needed, then low-pressure rinse to remove residues.
- Controlled pressure cleaning: Use a surface cleaner at measured PSI for uniform results, with wand only at edges and joints as needed.
- Drying, re-sanding, and edge care: Allow adequate dry time, sweep and compact sand to proper depth, remove excess from the face and edges.
- Sealing and cure: Apply the right paver sealer for your surface and use case, back-roll for even coverage, and respect cure times before parking or heavy use.
That’s the skeleton. The craft is in the adjustments: more chemistry for shade-grown algae, hotter water for oil if available, fan tips instead of turbo nozzles, and enough patience to let each stage do its job.
Picking the right sealer matters as much as the wash
People search paver sealer with a picture in mind. Some like a deep, wet look with richer color. Others want a natural finish that barely changes appearance. Start with how the area is used. On driveways, I favor penetrating sealers or low-gloss film-formers that resist tire marks and hot-tire pickup. Around pools, slip resistance is non-negotiable, so we avoid heavy gloss. On natural stone, a breathable penetrating sealer keeps the look honest and reduces risk of trapping moisture.
The quality of the product and the way it’s applied decide longevity. A good sealer applied to a clean, dry surface with correct coverage rates often lasts 2 to 3 years on driveways and longer on shaded patios. Go too heavy, and you risk whitening. Go too light, and you barely get protection. If you’ve ever seen cloudy patches after rain, that’s trapped moisture or chemistry left behind. It’s preventable with proper prep.
When pressure washing alone makes sense
There are scenarios where a straight pressure wash, done right, fits the bill. If the pavers are new enough that sealing is premature, you can remove construction dust and light surface grime with a surface cleaner and careful technique. If you plan to sell the home and want a quick refresh without re-sanding or sealing, a moderate-pressure clean may deliver enough curb appeal to make the driveway pop in photos. For polymeric-sand joints that are tight and well-cured, a controlled pass won’t blow them out.
Pressure-only cleaning, however, is a short-term cosmetic fix on surfaces with existing organic growth. The algae spores remain, and the green will return faster. That’s why even in a pressure-only service, I’ll often use a mild post-treatment to suppress regrowth, especially in damp zones.
When soft washing carries the day
Soft washing is my first choice on fragile surfaces, around delicate landscaping, and on joints you want to preserve. It’s also the go-to on regularly maintained properties where the goal is to prevent buildup rather paver cleaning Lutz than recover from it. If your pavers are sealed and you keep up with annual rinses and light biocidal treatments, your sealing cycles stretch and your surface ages gracefully. Soft washing is also kinder to stucco, siding, and garage door finishes near your driveway. If you’ve had overspray etch glass or dull a bronze screen frame, you already know why control matters.
The cost and time equation
Homeowners often ask about cost differences between pressure washing and soft washing. On pavers, the labor time is similar when the job is done thoroughly. Soft washing requires dwell and rinse time, plus care around landscaping. Pressure washing moves faster across open areas, but you pay that time back at edges and joints. The biggest driver of cost is scope: whether you’re re-sanding and sealing after cleaning, and whether stain removal or sealer correction is involved.
For a typical two-car driveway, cleaning alone might take 1.5 to 3 hours depending on condition, with a fair weather window for drying. Add re-sanding and sealing, and you’re often looking at a same-day clean and sand, then sealing later that afternoon if weather and humidity allow, or the following day for best results. In Florida humidity, I prefer a longer dry between rinse and sealer on dense pavers. That caution prevents hazing and improves penetration.
Safety and runoff: what responsible crews do
Water goes somewhere. A responsible pressure washing service plans flow paths, protects plants, and avoids pushing dirty water into lakes or storm drains. On drives with heavy organic buildup, we’ll brush gutters and trap solids before final rinses. Chemistry use stays inside the manufacturer’s guidelines, and we neutralize as needed before discharge. If you’ve had landscape burn from a previous cleaning, ask your next provider to outline plant protection steps. It’s not optional.
Slip hazards are real after cleaning. A wet paver, especially a freshly sealed one, can be slick until fully dry. I block off access when needed and advise clients on cure times. For busy households, we set schedules that allow overnight curing before the morning school run.
A case from the field
A Lutz homeowner called about a white, streaked driveway that had been “sealed” six months prior. The sealer was hazy in patches and sticky where hot tires parked. The installer had pressure washed at high PSI, left moisture in the joints, then applied a heavy, high-gloss acrylic mid-afternoon in August. You can guess the rest.
We tested a small area with a sealer remover, then adjusted the plan to a two-stage strip. After a controlled strip and thorough low-pressure rinse, we let the pavers dry 24 hours in good weather, checked moisture content, re-sanded, and applied a quality low-gloss sealer at proper coverage with back-rolling. The result wasn’t just better looking. It was stable. Six months later the driveway still looked even, with zero tire pickup. The difference wasn’t magic, just matching method to material and climate.
How to decide for your pavers
If you’re weighing pressure washing vs. soft washing for your driveway or patio, start with three questions: What are the pavers made of? What kind of dirt or failure are you seeing? What’s the next step after cleaning? If sealing is on the agenda, invest in prep. If maintenance is the goal, choose the gentlest method that gets you clean.
A blended approach wins most of the time. Pre-treat organic growth, soft wash the surface, use controlled pressure where mechanical removal is needed, then rinse and dry thoroughly. Re-sand and seal when appropriate, with a paver sealer suited to your material and use. If you’re searching for driveway pressure washing near me or comparing companies for paver sealing, ask them to walk you through that sequence. The clarity in their answer is a better predictor of results than the price per square foot.
Final guidance you can use this weekend
Here’s a simple decision filter to keep on hand before you book a service or rent a machine.
- Light algae and dust on sealed pavers: Soft wash with proper rinse. Skip aggressive pressure.
- Heavy tire marks on unsealed concrete pavers: Pre-treat, then controlled pressure with a surface cleaner.
- Failing or blotchy old sealer: Plan on stripping, not just washing. Test first.
- Loose, low, or eroded joints: Expect re-sanding after cleaning, soft or pressure.
- Natural stone or delicate surfaces: Favor soft wash and breathable sealers, avoid harsh chemistries.
If you’re local and looking for paver cleaning Lutz homes can rely on, focus less on the label and more on the process. A thoughtful washing and sealing plan preserves the look you paid for and keeps maintenance predictable. The right pressure in the right place, the right chemistry in the right dose, and patience at each step beat brute force every time.
Bulletproof Pavers
Address: 1523 Green Meadow Dr, Lutz, FL 33549
Phone: (813) 401-0693