Paver Cleaning Lutz: Common Mistakes to Avoid
Pavers look forgiving, and that’s partly why they get mistreated. Brick and concrete pavers around Lutz hold up to heavy rain, sprinkler overspray, pool splash-out, and Florida heat, but they have weak spots. I spend a lot of time fixing surfaces that were cleaned or sealed with good intentions and poor technique. The cost difference between doing it right and doing it twice can be 3 to 5 times, especially once efflorescence, polymer haze, or trapped moisture sets in.
If you’re searching “paver cleaning Lutz” because your driveway has gone blotchy or your lanai pavers feel sticky, you’re not alone. The good news is that most problems are avoidable with the right prep, pressure, chemistry, and timing. Below are the mistakes I see most, what they look like on the ground, and how to steer clear of them whether you’re hiring a pressure washing service or tackling it yourself.
Misreading What’s Actually Dirty
Dirt is rarely just dirt. In our area, the top layer on pavers mixes organic growth, irrigation iron, tannins from live oaks, and tire polymer residue. Treat it like plain soil and you’ll chase stains that won’t budge.
Rust from well water or old sprinkler lines leaves orange arcs at the driveway edge and around pop-up heads. A standard pH-neutral cleaner will hardly touch it. You need an acid-based rust remover formulated for masonry, applied cool and evenly, then thoroughly neutralized and rinsed. Go too strong or leave acid to dwell too long and you’ll etch the surface, bleaching sand and opening pores that catch more grime later.
Black and green algae want shade and moisture. Pool screens create just enough. Here, sodium hypochlorite does the heavy lifting. Under-dose and you waste time. Over-dose and you burn vegetation, pit metal, and leave white weeping along coping. The right approach is consistent dilution, gentle agitation, and controlled dwell time, followed by a low-pressure rinse.
Oil and tire marks respond to alkaline degreasers and heat. Skip this step and a surface cleaner will just polish the grime. Identify the contaminant first, then match the chemistry. That one decision saves hours and preserves the paver face.
Over-pressuring: When Clean Becomes Carved
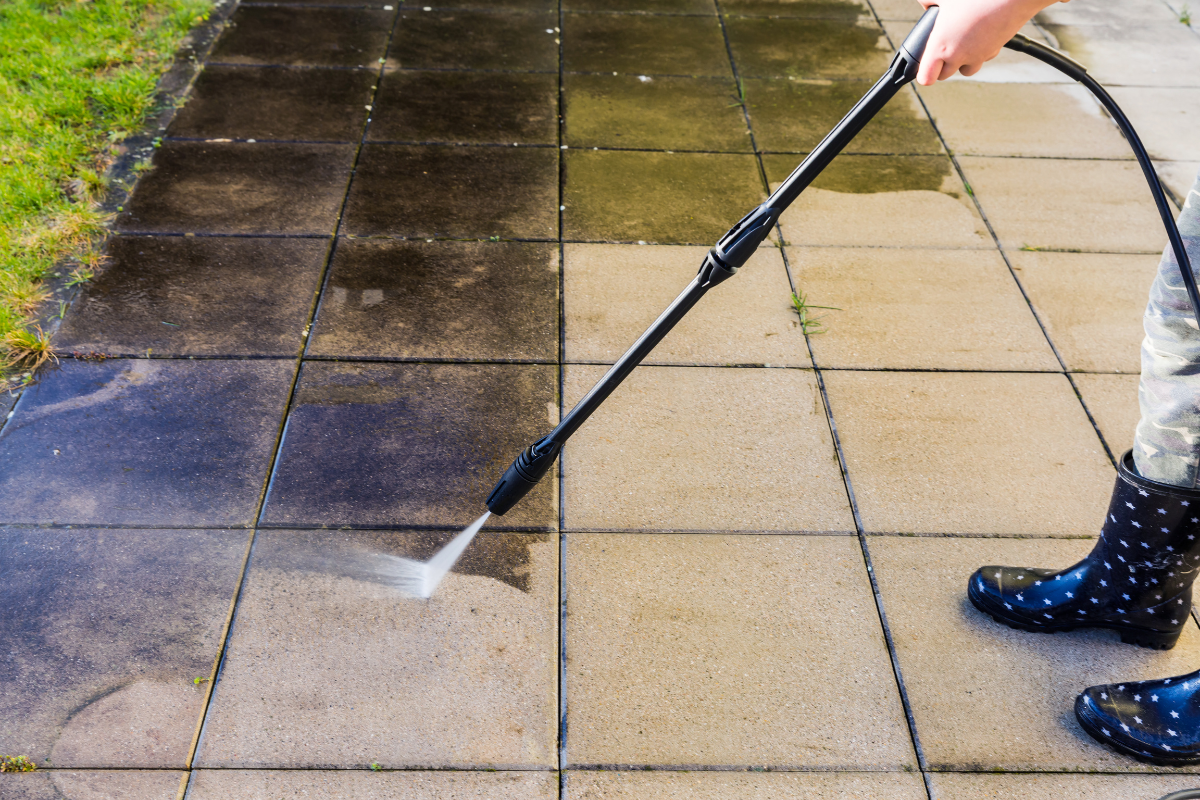
Pavers can take water, but not needle jets at close range. The most common damage I see comes from a homeowner or new tech using a red or yellow tip and carving fans into the surface. It looks clean at first, then dries in zebra stripes. Once texture is altered, it holds dirt unevenly and absorbs sealer in blotches.
A professional-grade surface cleaner with balanced spray tips produces even, overlapping passes that avoid tiger striping. Pressure is only part of the equation. Flow rate, tip size, and walking speed matter as much. On most residential pavers, 2,500 to 3,200 PSI with adequate flow works, but the operator’s control decides the outcome.
Edges need special care. Those narrow borders along pool screens, columns, and curbs are where I see chatter marks from wand twitching. Use a white or green tip, keep the wand moving, and aim to float the water rather than force it into joints. Treat sand loss as damage, not a byproduct.
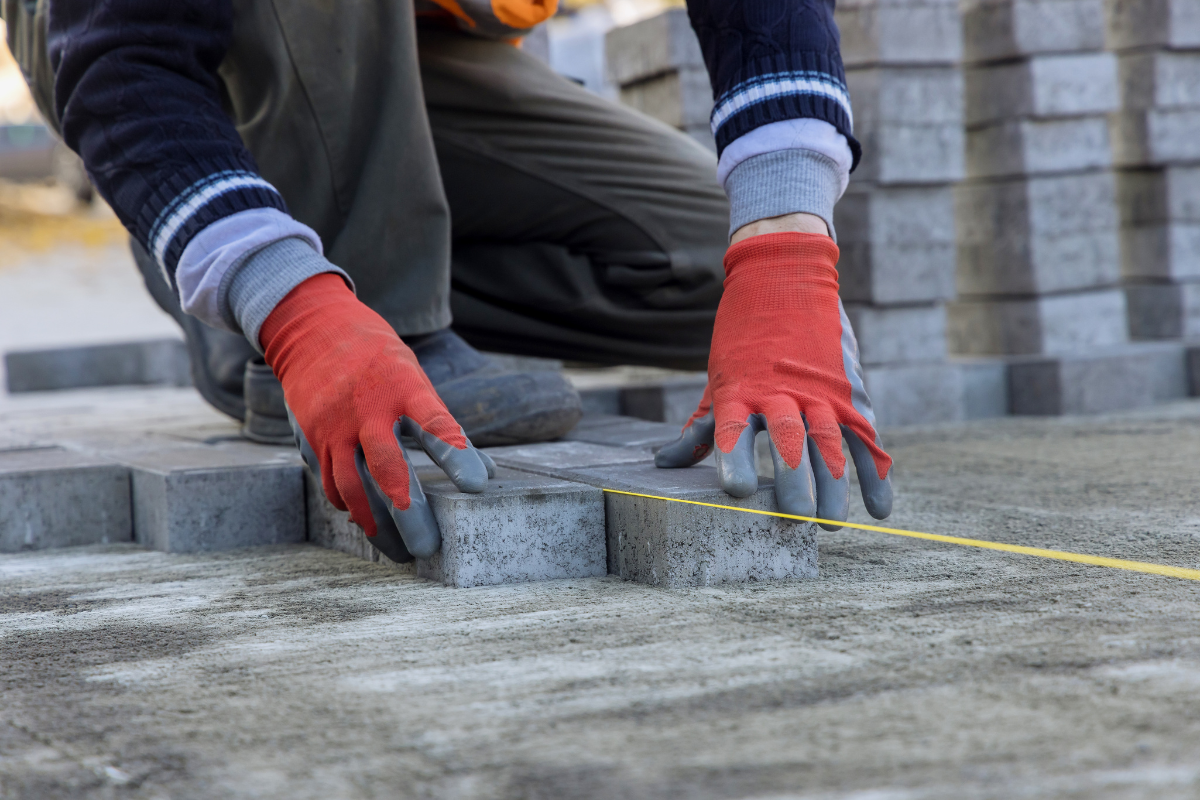
Ignoring Joint Integrity and Base Stability
Paver systems are interlocking, not monolithic. The joint material does as much work as the stone. Aggressive wand work or too many passes with a high-flow surface cleaner can empty joints and undermine the bedding sand. You get wandering bricks, a crunchy feel underfoot, and water pooling where it used to sheet off.
I tell clients to think sequence, not event. Clean, allow to dry, inspect joint depth, re-sweep clean, angular sand, compact if necessary, sweep again, then seal. If you are using polymeric sand, the prep becomes more exacting. The joints must be dry top to bottom, free of dust, and at the right depth. Introduce polymer dust to a damp joint and it glues to the paver face, creating hazy halos that require acid washing to remove, and even then not always completely.
Walk the surface after cleaning. If you see low joints, fill them. If the pavers rock, the base has moved. It’s cheaper to reset a few square feet now than to lock a wobble under a paver sealer and fight it for years.
Sealing Over Moisture
Our humidity and daily showers make “dry” a moving target. Sealing over moisture is the number one reason for milky or cloudy finishes. The trapped water tries to escape and gets caught beneath the film, especially with solvent-based products in the summer.
You can’t trust the surface feel alone. Shaded areas along the house, north exposures, and joints stay damp long after the faces look dry. I carry a moisture meter for pavers, which takes the guesswork out in borderline conditions. If you don’t, give it time. A windy morning can dry a driveway in four hours. A still afternoon after a rain may take a day and a half. Heavier-bodied sealers are less forgiving than penetrating, natural-look products.
If your schedule pushes you to seal late in the day, remember dew. Overnight moisture landing on tacky sealer leaves a chalky blush by morning. When clients type “paver sealing near me” and ask why one company is cheaper, timing and patience around moisture is often the difference.
Using the Wrong Sealer for the Job
There is no universal paver sealer. Make a poor match and you invite peeling, ambering, slipperiness, or joint washout. The right selection depends on paver type, exposure, desired sheen, and how you use the space.
Concrete brick pavers around a pool benefit from breathable, penetrating sealers that stabilize joint sand without building a thick film. A wet-look, high-solids solvent will deepen color beautifully on a shaded driveway, but on a sunbaked lanai it can soften and scuff. Travertine or shell stone needs a different approach entirely. A penetrating, non-film-forming product resists salt and makes maintenance easy without creating a plastic look.
Beware of mixing chemistry. If a previous installer used a solvent acrylic and you put a water-based acrylic on top, you may get poor adhesion. The opposite stack can also fail. If you don’t know what’s on there, a small test patch with compatible cleaners and a solvent rub can help identify it. Sometimes the correct move is to strip and reset rather than layer new on old. Stripping is labor-intensive and chemical-heavy, so it should be a deliberate choice, not a surprise on a Saturday afternoon.
Over-application and Lap Lines
More is not better with sealer. Heavy coats trap solvents or water, leading to whitening and soft spots. I’ve seen jobs where the first coat performed well, then a second heavy coat created holidays and lap lines that stood out in late-day sun. The fix usually requires xylene reflow on solvent systems or partial stripping on water-based ones.
Most pavers respond best to two light, even coats applied at the coverage rate specified by the manufacturer. Crosshatch your passes and keep a wet edge. If you spray, back-roll in the same direction to reduce tiger stripes. If you roll, load lightly and work from joints out to faces to avoid puddling sealer in low spots. It is easier to add a third, feathered pass in high-traffic areas than to correct a flood coat that cured splotchy.
Skipping the Neutralization Step
When rust, efflorescence, or mortar haze requires acidic cleaners, the residential paver sealing follow-up rinse needs to be thorough and often alkaline. Leaving acidic residue behind can etch slowly and degrade the binder in polymeric sand. It also sets the stage for inconsistent sealer adhesion.
I keep a mild alkaline rinse on hand and use it anytime I lean on acid. Think of it as closing the loop. The pH balance matters not just for the moment, but for the chemistry of the sealer you plan to use. A simple litmus test strip can confirm you’re back in a safe range before moving on.
Timing and Weather Windows in Lutz
Weather can be ideal at 8 a.m. and punishing by noon. Summer clouds roll in, humidity spikes, and a five-minute sprinkle can undo two hours of prep. Pay attention to forecasts, but also read the site. Is the driveway under big live oaks that drip? Does the irrigation come on at 3 a.m. and again at 6 p.m.? Can you control the sprinklers during curing? A surprise irrigation cycle is a common culprit behind water spots and white rings that clients think came from rain.
I ask clients to shut irrigation 24 hours before and after washing and sealing when possible. For pool decks, watch for windblown spray. Even a fine mist across a curing solvent sealer can stipple the surface.
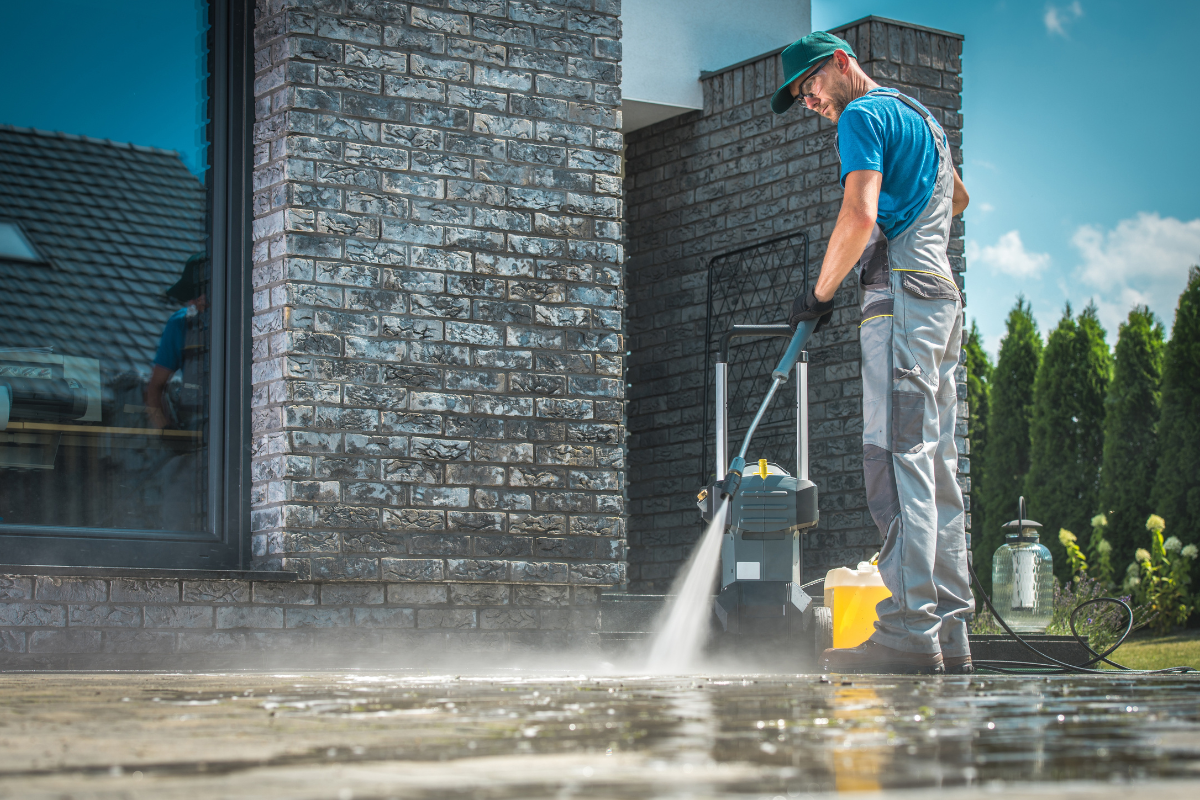
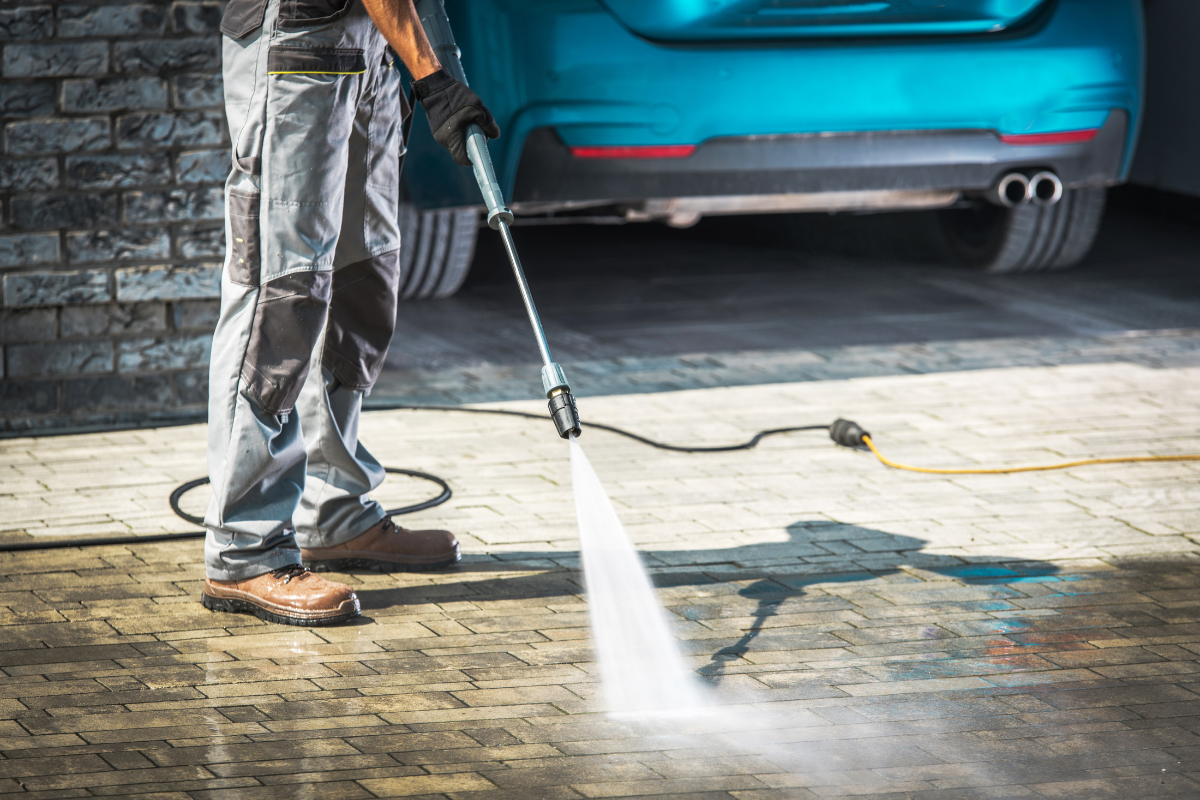
Thinking Pressure Washing Alone Equals Clean
Pressure washing is mechanical. It breaks the bond of soil on the face. It does not sanitize joints, address biofilm, or remove embedded oils without help. The result of a water-only clean often looks good for a week, then turns green or hazy again.
Pre-treatment matters. A mild sodium hypochlorite solution cuts organics and keeps growth from returning quickly. An alkaline degreaser loosens tire polymers and sunscreen residue near pools. Use the chemistry to do the heavy lifting, then rinse with controlled pressure. The difference shows up three months later when the surface still looks crisp.
For searches like “driveway pressure washing near me,” ask the provider what their process includes. If the answer is only “3,000 PSI and a surface cleaner,” expect a fast refresh, not a long-lasting result.
Forgetting Edges, Drains, and Transitions
Details make jobs look finished. Leaves and sludge accumulate in expansion joints along garage thresholds, at pool drains, and around screen enclosures. If these areas are left dirty, the first rain washes grime back onto clean pavers, leaving trails that look like bad cleaning. Blow out the debris before you start, flush drains thoroughly, and protect nearby glass from overspray.
Transitions to asphalt or poured concrete need masking or delicate wand work. A solvent-based paver sealer will stain concrete if it creeps past the joint. On pool decks, tape is not enough if the sealer runs thin. Use guard boards and work in small sections to prevent drips.
Overlooking Efflorescence and Its Timing
White, powdery bloom that wicks through concrete pavers is efflorescence. It is natural, driven by moisture migration and salts within the paver. If you seal too soon after installation, you can lock in active efflorescence that will ghost under the film. If you clean it with acid and then seal too quickly, the residual moisture can drive more salts to the surface.
Let new installations breathe. Depending on conditions, that may mean weeks to a few months. If efflorescence appears, use a dedicated remover, rinse and neutralize thoroughly, then allow a drying period before sealer. In Lutz, spring and fall dry spells make this schedule easier than the heart of summer.
Neglecting Safety and Surroundings
Bleach and acids etch metal and spot glass. Solvent vapors linger near water heaters and enclosed lanais. Before starting, cover stainless grill fronts, pre-wet and rinse plants, and open screen doors for airflow. Move vehicles. Tape door thresholds so sealer doesn’t wick under weatherstripping. The best cleaning in the world looks bad if the neighbor’s new SUV gets spotted or the pool hardware pits.
For DIY work, proper PPE is not optional. Eye protection, gloves, and footwear with grip help prevent slips on wet sealer. More than one homeowner has learned that glossy pool decks and flip flops don’t mix.
Failing to Plan Maintenance
Even a great washing and sealing job is not a permanent solution. Traffic, UV, and water wear every sealer. Film-forming products need recoat cycles generally every 18 to 36 months, depending on exposure. Penetrating, natural-look products can go longer, but they still benefit from periodic cleaning and joint inspection.
A simple seasonal habit stretches the life of your investment. Rinse the surface during pollen season. Address leaf tannin stains within days, not months. Spot-treat algae before it mats. Keep irrigation heads aimed away from pavers. The difference between a driveway that looks good for two years and one that looks good for five is usually routine, light-touch care.
When to Call a Professional
There’s no shame in bringing in a pressure washing service when the job crosses a certain threshold. If you see polymeric sand haze, widespread rust arcs, sealer whitening, or active efflorescence, experience matters. Professionals carry the right nozzles, neutralizers, and specialty removers, along with insurance, which matters if something goes wrong around glass, screens, or pool equipment.
If you search “paver sealing near me,” vet providers with a few specific questions. Ask what sealer they plan to use and why. Listen for attention to moisture content, weather windows, and prep steps like pH balancing. Ask how they protect plants and adjacent surfaces. A clear process is a good sign. Beware of contractors who promise heavy gloss everywhere. High sheen is a style choice, but it is not the right fit for every surface, and it can become slick when wet.
A Practical Workflow That Works in Lutz
Here is a distilled sequence we follow consistently because it respects our climate and the way pavers behave:
- Pre-inspection and prep: Identify contaminants. Protect plants and metals. Disable sprinklers. Blow debris from joints and drains.
- Targeted pre-treatment: Apply cleaners matched to the stains, allow proper dwell, and agitate where necessary.
- Controlled washing: Use a surface cleaner for open fields, a wand for edges and tight areas, and appropriate pressure to avoid joint loss.
- Neutralize and rinse: Bring pH back to a safe range after any acid work. Rinse thoroughly so no residue remains.
- Drying and joint work: Allow complete drying. Refill joints with clean, angular sand. For polymeric, follow manufacturer moisture guidelines closely.
- Sealing: Apply thin, even coats of a suitable paver sealer, monitoring weather, shade, and dew risk. Maintain a wet edge and avoid puddling.
Keep curing areas clear for the time specified by the product. Foot traffic too soon can leave scuffs that are preserved under the film.
Real Outcomes From Avoiding Common Mistakes
A few examples help illustrate how these choices play out.
A Lake Padgett driveway showed milky panels after a summer rainstorm hit during sealing. The installer had put down a heavy solvent coat toward evening. We tested a xylene reflow on a small section, which relaxed the blush and restored clarity. The fix worked because the whitening was solvent entrapment, not moisture sealed under a water-based film. Had the wrong chemistry been used, stripping would have been the only option.
A pool deck in Willow Bend had chronic green shading along the screen perimeter. Previous cleanings relied on high pressure that stripped joints thin without killing the algae. We pre-treated with a measured sodium hypochlorite solution, rinsed low pressure, rebuilt joints, and used a breathable sealer. The deck stayed clean through the next rainy season because we addressed the biology, not just the appearance.
A new paver patio near Collier Parkway was sealed two weeks after install, then bloomed with efflorescence under the film. We stripped, treated efflorescence twice, let the system dry for 10 days in a low-humidity window, then sealed with a penetrating product. Waiting felt tedious to the homeowner, but a year later the surface still looked uniform.
Choosing Between DIY and Pro Service
If your pavers are lightly soiled, and you have time to plan around weather, a careful DIY clean can turn out well. The keys are gentle pressure, correct chemicals, and patience with drying. Where DIY tends to fall apart is on specialty issues: rust, sealer failure, polymer haze, and moisture management before sealing.
When evaluating a provider for paver cleaning Lutz, look at more than price. A low bid that skips pre-treatment, neutralization, or joint restoration is not cheaper once you add the cost of early failure or corrective work. A company that understands washing and sealing as a system, not separate tasks, usually delivers better value.
Final Thoughts for Long-Lasting Results
Pavers are an investment. With care, they outlast many other surfaces and keep curb appeal high. The path to that outcome runs through judgment calls that respect materials and climate. Avoid aggressive tips and rushed timelines. Match cleaners to stains and sealers to pavers and exposure. Keep moisture out of the equation until it is time to rinse or until the sealer is fully cured.
If you want help and you’re searching for “pressure washing” or “driveway pressure washing near me,” prioritize providers who can explain their process plainly. If you prefer to do it yourself, slow down and build in buffers for our local weather. The difference shows up not just on day one, but months later when your pavers still look like a well-kept part of your home, not a project waiting to be redone.
Bulletproof Pavers
Address: 1523 Green Meadow Dr, Lutz, FL 33549
Phone: (813) 401-0693